Oculus Rift HDMI Not Connected Problem? – Your Ultimate Guide!
Oculus Rift HDMI Not Connected Problem.
The Oculus Rift HDMI Not Connected Problem haunted so many of us for years. I have seen many having these issue for years and currently me as well! A couple months back out of the blue after five amazing years of VR Oculus Rift S gaming and simming the unit started cutting out and reconnecting randomly. I noticed the sound was also very crackly as if it has some interference on the line. I was quite bemused as I keep a tight ship on my PC as far as maintenance etc. So here is where the frustration starts for us all!
I continued playing and found that X Plane 12 would allow me to reset the Oculus / or self-reset and reselect VR mode and it would continue so that was an annoyance, so this is where my Oculus Rift HDMI Not Connected Problem started. DCS and other games would just freeze or CTD and that was that. I wanted to share with you my recent experience! Let me first say my issue has been resolved so I suggest the following steps to resolve your issue.
- Latest CPU’s Available Now – Amazon.com
- Get a NEW GPU Best Performance – AMAZON.com
- Upgrade RAM Here today – AMAZON.com
- Prebuilt PC Options – AMAZON.com
Fault Finding Guide.
The steps suggested to resolve the Oculus Rift HDMI Not Connected Problem issue came through the forums and could very well resolve your issues so we will look at each of these steps. Fault finding should follow a logical path from physical headset issues to ancillary items then the system i.e. your PC settings and Oculus Software.
- Error Messages
- Cable Connection – Headset End
- Headset Damage.
- Cable Damage
- Oculus Drivers Up to Date?
- Repair the Oculus Software – Repair.
- Uninstall/Reinstall Fresh Oculus Software.
- GPU Drivers – Up to date?
- USB 3.0 Available and Working.
- USB 3.0 Power Settings – Ensure not in Power Saving Mode.
- Not Enough USB 3.0 Power.
- Update USB & HUB Drivers.
- Contact META Chat – The final Option!
- Create Oculus Report
- Create Windows Log
Error Messages.
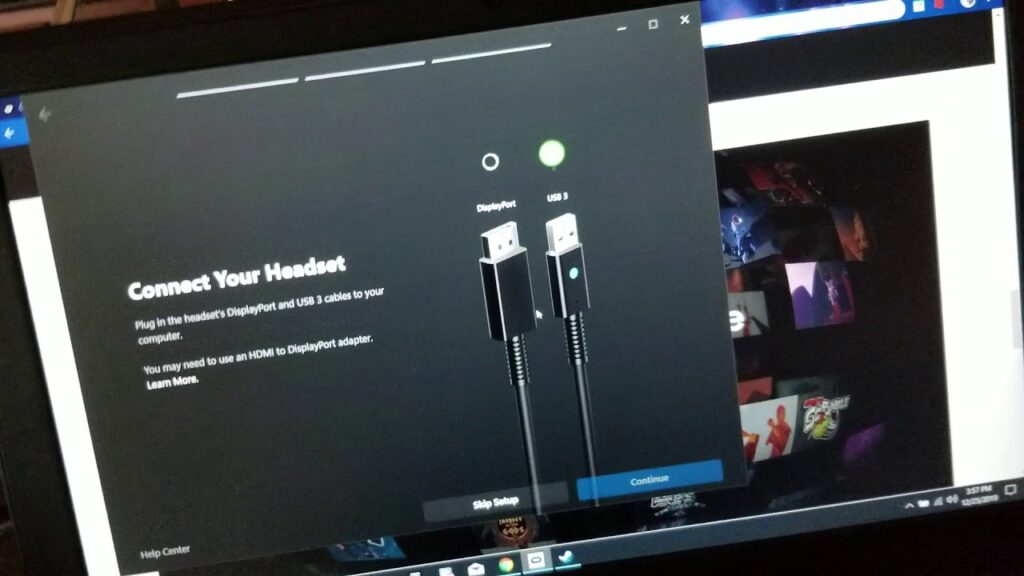
First check out the error messages that appear as these can have an indication of what’s wrong. I experienced two primary Error Messages! These were the:
Display disconnected Please Connect your Headset.
USB disconnected – Please Reconnect to USB 3.0 or USB not connected to USB 3.0 Please connect to USB 3.0
Your Headset is not connected (When it really is) Please reconnect your headset!
Headset Damage?
The first part of any fault-finding exercise is to physically check the components for this Oculus Rift HDMI Not Connected Problem issue. If you are not sure give your Oculus Rift S as this may be part of your Oculus Rift HDMI not connected problem. Check for obvious damage such as cracks etc should it have been dropped or something dropped onto it.
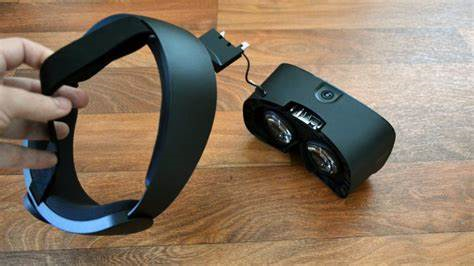
Check the connections and headset mount is connected correctly. You can quickly remove the headband by sliding the lock located between the lenses. Slide it from lock to unlock and push the button under the Rift S headset to release it. Ensure you disconnect the audio plug so as not to damage it.
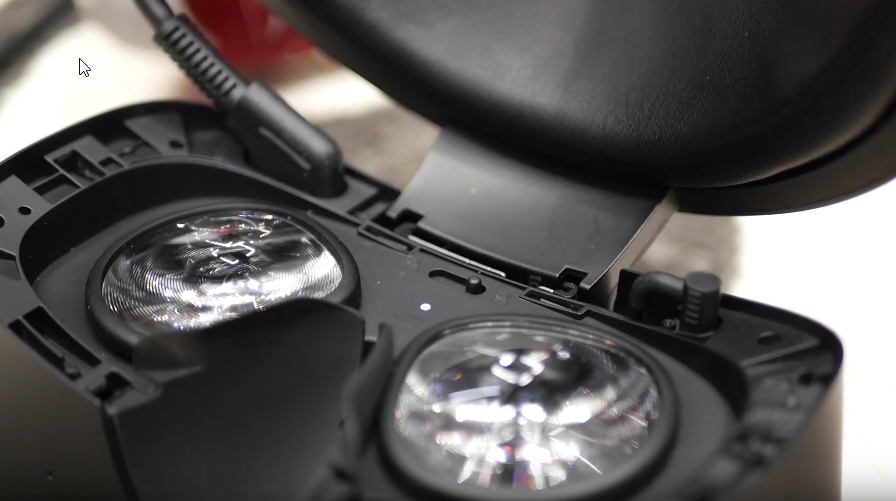
Remove the face padding which just clips off very easily and check the Oculus Rift connector is fully connected! This connector I found to be loose and hoped it was the answer to my immediate issue. I cleaned the connector and ensured when I pushed it back there was a click as it connects. It is quite tight so be careful. Check the camera lenses around the front of the Oculus Rift S and ensure they are clean and not damaged.
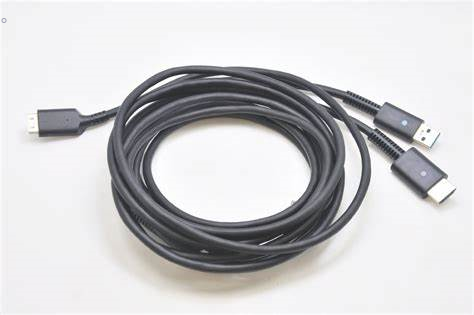
Check the Oculus Cable.
Check the Oculus Rift S cable for any obvious damage. Check the display port as well as the USB 3.0 and headset connectors are not damaged! Inspect the length of the cable for any cuts or kinks that may have accumulated during use or accidental dropping of the cable or items falling on the cable.
Next with the cable connected to the Oculus Rift and it turned on with the software also on move the connectors a little as they could get moved by your game play and see if there is any immediate disconnection of the headset. If not, then I would reasonably assume the cable and its connectors are ok. If you get any disconnection while moving the cable or putting slight pressure on connectors this confirms the cable is likely OK!
If you get a disconnection then it’s quite possible the cable is the issue, and you may have to find another one. This is quite a challenge with Amazon having them available at $125/$145 USD in most of the adds I’ve seen. ((Link supplied is the most popular but is more expensive FY) This may seem an obvious Oculus Rift HDMI Not Connected Problem solution, but it’s often overlooked.
Oculus Rift Drivers Update
Enable Automatic Updates (Recommended): Oculus often releases driver updates automatically through their Oculus software. By default, the Oculus app is set to automatically update itself and the connected hardware. However, it’s a good idea to double-check that this feature is enabled:
- Open the Oculus app on your computer.
- Click on Settings (the gear icon) in the upper-right corner.
- Under the General tab, ensure that the option for Automatic App Updates is turned on.
- Also, make sure that Automatic Updates for Oculus hardware are enabled.

Oculus Software Repair.
If you’re experiencing issues with your Oculus software and need to repair it, you can use the Oculus software’s built-in repair feature. Here are the steps to repair the Oculus software:
- Open Oculus App: Launch the Oculus app on your computer if it’s not already open.
- Access Settings: Click on the gear icon located in the upper-right corner of the Oculus app. This will take you to the Settings menu.
- Choose “Beta” (Optional): In some cases, opting into the Oculus Public Test Channel (beta version) can give you access to the latest fixes and features. If you want to try this, go to the Beta tab in the Settings menu and click the “Switch” button to join the beta program. This step is optional and not necessary for the repair process.
- Select “Repair”: In the left-hand menu, click on the Beta tab (if you’re not in the beta program, you’ll find this under the General tab). Then, under the Beta tab, scroll down to find the Repair Oculus option.
- Begin Repair: Click on the “Repair Oculus” button. The repair process will start, and Oculus will attempt to fix any issues with the software.
- Follow On-Screen Instructions: Follow any on-screen prompts or instructions that appear during the repair process. Depending on the issues detected, you may need to restart your computer or Oculus headset.
- Complete the Repair: Once the repair process is finished, you should see a confirmation message. Verify that the issues you were experiencing have been resolved.
- Restart Oculus and Computer (if necessary): To ensure that any changes take effect, it’s a good practice to restart both your Oculus headset (if applicable) and your computer.
By using the “Repair Oculus” feature, you can often resolve common issues and problems with the Oculus software. If you continue to experience problems after repairing the software, you may need to contact Oculus Support or seek further assistance based on the specific issue you’re facing.
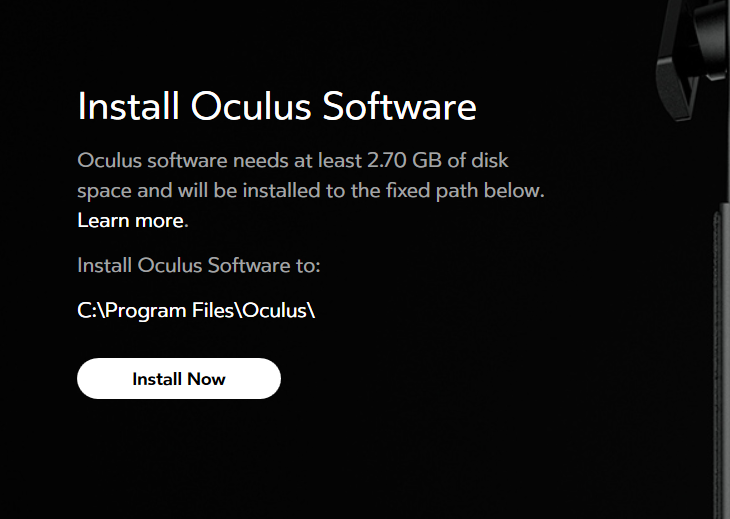
Oculus Software Uninstall/Reinstall Fresh Copy.
Uninstalling and then reinstalling the Oculus software can be an effective way to address various issues and start with a clean slate. Here are the steps to uninstall and reinstall the Oculus software:
Uninstall Oculus Software:
- Close Oculus App: If the Oculus app is currently running, exit or close it.
- Uninstall Oculus App:
- On Windows:
- Open the “Settings” app (Windows key + I).
- Go to “Apps” or “Apps & Features” (the exact name may vary depending on your Windows version).
- Scroll through the list of installed apps, locate “Oculus,” and click on it.
- Click the “Uninstall” button.
- Follow the on-screen prompts to uninstall the Oculus software.
- On macOS:
- Open Finder.
- Go to the “Applications” folder.
- Locate the “Oculus” app and drag it to the Trash.
- Empty the Trash to complete the uninstallation.
- On Windows:
- Restart Your Computer: It’s a good idea to restart your computer after uninstalling the Oculus software to ensure that all related files and processes are cleared.
Reinstall Oculus Software:
- Download Oculus Installer:
- Visit the official Oculus website (https://www.oculus.com/setup/).
- Click on the “Download Oculus Software” button.
- Follow the on-screen instructions to download the Oculus Installer.
- Install Oculus Software:
- Run the Oculus Installer that you downloaded.
- Follow the installation wizard’s instructions to install the Oculus software.
- During the installation, you may be prompted to connect your Oculus headset. Follow the prompts to do so.
- Set Up Your Oculus Account:
- After the installation is complete, launch the Oculus app.
- Sign in with your Oculus account or create a new one if you don’t have an account already.
- Follow the on-screen setup instructions to configure your Oculus headset, including setting up your guardian boundaries and updating firmware.
- Reinstall VR Content (if applicable):
- If you had any VR games or apps installed previously, you may need to reinstall them from the Oculus Store.
- Check for Updates: After the reinstallation, check for Oculus software updates and firmware updates for your Oculus devices to ensure you have the latest versions.
By uninstalling and then reinstalling the Oculus software, you should have a fresh installation, which can help resolve many software-related issues. If you were experiencing problems before, they may be resolved with this clean installation. If you encounter any issues during or after the reinstallation, consult Oculus support resources or reach out to their customer support for further assistance.
Shop Options
GPU Drivers – Up to Date?
To ensure that your GPU drivers (NVIDIA or AMD Radeon) are up to date, you should follow these steps:
For NVIDIA Graphics Cards:

- Identify Your GPU Model:
- Click on the Windows Start button.
- Type “Device Manager” and open it.
- Expand the “Display adapters” section to see your NVIDIA GPU model.
- Visit the NVIDIA Website:
- Go to the official NVIDIA Driver Downloads page: https://www.nvidia.com/Download/index.aspx
- Download and Install the Latest Driver:
- Enter your GPU details in the search fields or select your GPU model from the list.
- Click on “Search” to find the latest driver for your GPU.
- Download the driver.
- Run the downloaded installer and follow the on-screen instructions to update your NVIDIA GPU drivers.
- Restart Your Computer:
- After installing the new driver, it’s a good practice to restart your computer to ensure the changes take effect.
For AMD Radeon Graphics Cards:
- Identify Your GPU Model:
- Click on the Windows Start button.
- Type “Device Manager” and open it.
- Expand the “Display adapters” section to see your AMD Radeon GPU model.
- Visit the AMD Website:
- Go to the official AMD Drivers and Support page: https://www.amd.com/en/support
- Download and Install the Latest Driver:
- Enter your GPU details in the search fields or use the “Automatically Detect and Install Your Driver” tool.
- Download the driver.
- Run the downloaded installer and follow the on-screen instructions to update your AMD Radeon GPU drivers.
- Restart Your Computer:
- After installing the new driver, restart your computer to apply the changes.
Note: It’s important to uninstall your existing GPU drivers before installing the new ones. Both NVIDIA and AMD usually offer options to perform a “clean” installation during the driver installation process, which removes the previous drivers and settings. This can help prevent conflicts and issues.
Additionally, some users may prefer to use the GPU driver update features provided by the GPU manufacturers’ software. NVIDIA has the “GeForce Experience” application, and AMD has the “Radeon Software” application, both of which can help you keep your drivers up to date.
Regularly updating your GPU drivers ensures that you have the latest bug fixes, performance improvements, and compatibility updates for your graphics card. This is especially important for gamers and users of software that relies heavily on GPU performance.
USB 3.0 Available and Working.
To identify and check if USB 3.0 is available and working on your computer, you can follow these steps:
- Check for USB Ports: Physically inspect your computer for USB ports. USB 3.0 ports are typically blue in colour, but this may vary depending on the manufacturer. If you see blue ports, these are likely USB 3.0 ports. If you’re unsure, consult your computer’s user manual or visit the manufacturer’s website for specifications.
- Check Device Manager (Windows):
- Right-click on the Windows Start button and select “Device Manager.”
- Expand the “Universal Serial Bus controllers” section.
- Look for entries with “USB 3.0,” “XHCI,” or “SuperSpeed” in their names. These indicate USB 3.0 controllers.
- If you see such entries, USB 3.0 is available and working.
- Check System Information (macOS):
- Click the Apple menu in the top-left corner and select “About This Mac.”
- Click the “System Report” button.
- Under “Hardware” in the left sidebar, select “USB.”
- Look for “USB 3.0” or “SuperSpeed USB” in the list of connected USB devices. If you see these terms, USB 3.0 is available and working.
- Check Device Properties (Linux):
- Open a terminal window.
- Use the
usbcommand to list connected USB devices. - Look for devices labelled as “USB 3.0″ or “SuperSpeed.” If you see such devices, USB 3.0 is available and working.
- Transfer Speed Test: You can also perform a transfer speed test to confirm USB 3.0 functionality. Connect a USB 3.0 device (e.g., an external hard drive) to a USB 3.0 port and transfer a large file to or from the device. If the transfer speed is significantly faster than what you would achieve with USB 2.0, it indicates that USB 3.0 is working.
Remember that to take full advantage of USB 3.0’s speed, both the port and the connected device should be USB 3.0 compatible. If you’re unsure about the compatibility of a specific device or port, refer to their respective documentation or specifications.
Keep in mind that newer USB standards like USB 3.1 Gen 2 and USB 3.2 offer even faster data transfer speeds, so if you have compatible devices and ports, you can check for these as well using similar methods.
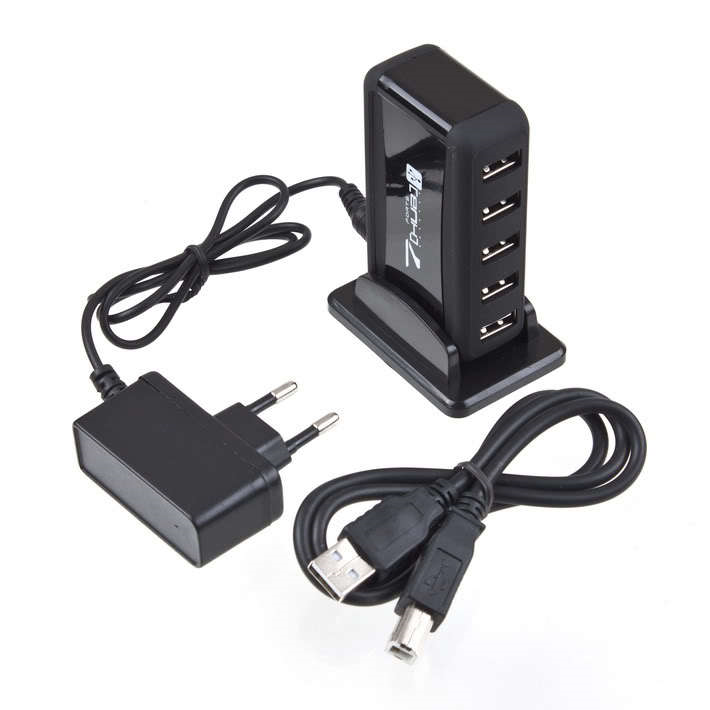
Not Enough USB 3.0 Power.
The USB 3.0 power has also proven to be an issue with some motherboards proving not to be able to keep up a constant power delivery for the higher demands of it. Some users have purchased an external powered USB 3.0 hub which has proven to remedy some of the users on the forums. This purchase is relatively inexpensive at around $20 USD but in this remedy, attempt remember it should have its own power source so its supplying additional power and maintaining a steady constant power delivery. Again, any or unfortunately none of these may help and the final step below may prove to be the answer.
USB 3.0 Power Settings – Ensure not in Power Saving Mode.
To ensure that USB 3.0 ports on your computer are not in power-saving mode, you can follow these steps. Keep in mind that the specific steps and options may vary slightly depending on your operating system (Windows, macOS, or Linux), so I’ll provide general instructions for Windows and macOS.
Windows:
- Open Device Manager:
- Press
Windows Key + Xand select “Device Manager” from the menu. - Alternatively, you can right-click on the “Start” button and choose “Device Manager.”
- Press
- Expand Universal Serial Bus controllers:
- In Device Manager, locate and expand the “Universal Serial Bus controllers” section.
- Locate USB Root Hubs:
- You will see a list of USB Root Hubs. These represent your USB ports.
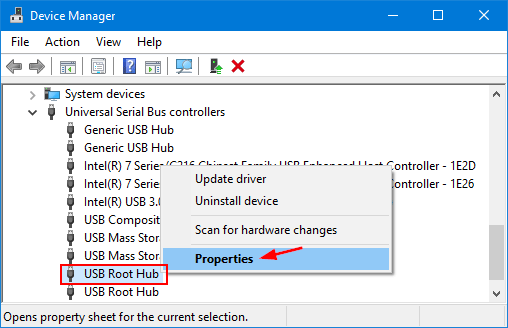
- Check Power Management Settings:
- Right-click on each USB Root Hub and select “Properties.”
- Disable Power Saving:
- Go to the “Power Management” tab.
- Uncheck the box that says, “Allow the computer to turn off this device to save power.”
- Click “OK” to save your changes.
- Repeat for all USB Root Hubs:
- Repeat steps 4 and 5 for each USB Root Hub in the list.
- Restart Your Computer:
- After making these changes, it’s a good idea to restart your computer to ensure the settings take effect.
macOS:
- Open System Preferences:
- Click on the Apple menu in the top-left corner of your screen and select “System Preferences.”
- Go to Energy Saver:
- In System Preferences, click on “Energy Saver.”
- Adjust USB Power Settings:
- Click on the “Power Adapter” tab if you’re using a laptop and want to configure USB power settings while it’s plugged in.
- You will see a section labelled “Put hard disks to sleep when possible.” Make sure this option is unchecked to prevent power-saving mode on USB ports.
- Close System Preferences:
- Once you’ve made your changes, you can close System Preferences.
- Restart Your Computer:
- After making these changes, it’s a good idea to restart your computer to ensure the settings take effect.
These steps should help you ensure that your USB 3.0 ports are not in power-saving mode. If you’re using a different operating system like Linux, the steps may vary, but you can typically configure power-saving settings through system preferences or configuration files.
Update USB & HUB Drivers.
Updating USB and hub drivers is an essential maintenance task to ensure proper functionality and compatibility with your computer’s hardware. Here’s a general guide on how to update USB and hub drivers in Windows. Keep in mind that the specific steps might vary slightly depending on your Windows version, but the overall process remains similar.
- Identify Your USB and Hub Drivers:
- Before updating drivers, you should identify the USB and hub drivers that need updating. You can do this by:
- Device Manager: Press
Windows Key + Xand select “Device Manager.” Under “Universal Serial Bus controllers,” you’ll find your USB and hub devices. - Note down the names of the drivers that you want to update.
- Device Manager: Press
- Before updating drivers, you should identify the USB and hub drivers that need updating. You can do this by:
- Visit the Manufacturer’s Website:
- Go to the manufacturer’s website of your computer or motherboard. They often provide driver downloads and support pages.
- Locate the Driver Updates:
- Look for driver updates specifically related to your USB and hub controllers. Manufacturers typically list them in the “Drivers” or “Support” section.
- Download the Latest Drivers:
- Download the latest drivers for your USB and hub controllers from the manufacturer’s website. Ensure that you download drivers compatible with your specific hardware and Windows version.
- Install the Updated Drivers:
- After downloading the drivers, run the installer. It will guide you through the installation process.
- Follow any on-screen instructions to complete the installation.
- Restart Your Computer:
- In many cases, driver updates require a system restart to apply the changes. Be sure to save any open work before restarting your computer.
- Verify Driver Updates:
- Once your computer restarts, you can verify that the driver updates were successful:
- Open Device Manager again (
Windows Key + X> “Device Manager”). - Check the “Universal Serial Bus controllers” section to see if the driver names have changed to reflect the updated versions.
- Open Device Manager again (
- Once your computer restarts, you can verify that the driver updates were successful:
- Windows Update (Optional):
- In some cases, Windows Update may offer driver updates for your USB and hub controllers. You can check for optional updates in Windows Update settings. However, it’s often a good practice to obtain drivers directly from the manufacturer’s website for the latest versions.
- Third-Party Driver Update Tools (Optional):
- If you find it challenging to manually update drivers or prefer a more automated approach, you can use third-party driver update tools. These tools can scan your system for outdated drivers and download/install updates for you. Be cautious when using third-party tools and ensure they are reputable.
Remember that regularly updating drivers is crucial for maintaining the performance and compatibility of your hardware components. Always make sure you download drivers from trusted sources, such as the manufacturer’s official website, to avoid potential issues with malware or incompatible drivers.


- Joystick / HOTAS – AMAZON.com
- Rudder Pedals – AMAZON.com
- Throttle Quadrant – AMAZON.com
- Gaming Chair – AMAZON.com
- VR Headset – AMAZON.com
Contact META Chat – The final Option!
I like many had gone through the steps above with some several times. In the end I decided to disregard searching the FORUMS and went online with the META SUPPORT chat. This turned out to be the answer to my problems, but we all understand each instance is different. Your experience may be different, and you may find one of the previous steps resolves your problems.
In contacting META /Facebook we went through all of the above remedies which proves they are a valid place to start. Once we got through all these procedures it was down to creating a log from within the OCULUS software which can be attached to the METS CHAT, and they spent 3-5 minutes looking at it while I waited patiently.
They said initially there wasn’t anything that stood out as an issue. Next, I was asked to create a windows system log file which they showed me how to be done fine. Once completed I uploaded this file and at this point, they said they needed to send my issue up the order to someone higher. The also said I would receive an email with further requests and information as needed.
The next morning, I received an email wanting the Serial Number of my headset with instructions on where to find it, my home address as well as proof of purchase and an enquiry if I still had the original Oculus Rift S box. Sadly, the box is long gone with me moving internationally the large box was an inconvenience. My proof of purchase was hard to find and would need to get years old statements from the bank. Proof of purchase was possible so got to requesting these.
IN subsequent emails they raised my issue higher and was informed that META had decided to replace my Oculus Rift headset and cable and I should hang onto my hand controllers. The postage etc would be FREE of charge so I was over the moon, again this unit us about five years old. I’m not sure everyone will get the same response but being patient and curious may go a long way to getting a positive response.
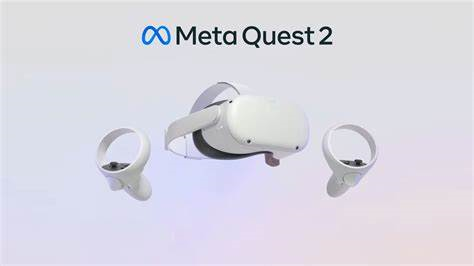
Currently I received an email with all the shipping information and a contact number which is all prepaid by META and now just have to waite for the post to deliver a NEW Oculus Rift S. I was somewhat surprised as they assured me it would be a NEW unit so I’m asking myself will it actually be a RIFT S as I thought they were out of production or one of the newer QUEST units? As always time will tell.

Author.
Brendon McAliece is a multi-lingual expat who brings over three decades of flight simulator/PC building experience as well as over two decades of real-world jet fighter experience as a weapons/egress technician. He holds a sport pilot certificate giving him real-world flying experience. Hi travels have taken him from Europe to the Middle East, Asia and his home of Australia. He has a passion for travel, languages, Flight simulation as well as Guitaring and Coffee. You can read more in his blogs below.
Learn More @ DreamingGuitar.com – DreamingCoffee.com – LetsFlyVFR.com
( HOME – BLOG – SHOP – ABOUT )
As an Amazon affiliate I may benefit from qualifying sales.