How to Optimize BIOS Settings For GAMING! – Don’t Leave Any FPS on the Table!
Note : In text links are to other relevant pages on LetsFLyVFR.com only.
This guide to optimize BIOS settings for gaming will take you to the realm of peak computing prowess! In the dynamic universe of modern computing, the pivotal nucleus driving system performance resides within the intricate domain of motherboard settings so it’s important to optimize BIOS settings for gaming. Unveiling the latent potential of your hardware demands a deft mastery of these settings, akin to orchestrating a symphony of electrons.
From overclocking wizardry to memory optimization, the labyrinthine corridors of performance motherboard settings offer a trove of customization options that can transmute your rig into a turbocharged powerhouse. In this exploration, we delve into the paramount realm of “Performance Motherboard Settings You Must Have!” – your compass to navigate the virtual cosmos where processing power knows no bounds.
Bios Up to Date?
Bios Update Steps:
Bios updates are not something you want to be doing regularly because it’s always possible that when you optimize BIOS settings for gaming by updating a BIOS if you lose power, you will break your motherboard. There are times when the manufacturer recommends it as well as if you’re having issues or need it to support new hardware when possible.
- Identify your current BIOS version by entering BIOS during startup (usually by pressing Del, F2, F10, or another key) or checking your motherboard’s documentation or software.
- Download the Update: Visit your motherboard manufacturer’s website and find the support or downloads section for your specific motherboard model. Download the latest BIOS update file.
- Prepare USB Drive: Format a USB flash drive as FAT32 and copy the BIOS update file onto it.
- Backup Settings: Enter BIOS and note down any customized settings. Some motherboards have a “Save Profile” option to make this easier.
- Update BIOS: Restart your computer and boot from the USB drive. Follow the manufacturer’s instructions for updating the BIOS. This usually involves selecting the BIOS update file from the USB drive and confirming the update.
- Wait and Restart: Let the update process complete. Your computer will restart automatically once the update is done.
- Joystick / HOTAS – AMAZON.com
- Rudder Pedals – AMAZON.com
- Throttle Quadrant – AMAZON.com
- Gaming Chair – AMAZON.com
- VR Headset – AMAZON.com
Can I Update Through Windows?
Some motherboards offer a Windows-based utility for updating BIOS, but it’s generally safer to update from within BIOS (UEFI). Windows-based updates can carry risks and may not be as reliable.
How Often Should I Update My BIOS?
BIOS updates are not necessary as frequently as other software updates. You should update your BIOS only if there’s a specific need, such as resolving hardware compatibility issues, stability problems, or if a new feature benefit you. If your system is running fine and you don’t encounter any problems, you might not need to update it for years.
Is It Dangerous to Update My System?
Updating the BIOS carries some risks, as a failed update could potentially render your motherboard unusable. However, if you follow the manufacturer’s instructions carefully and make sure you’re using the correct update file for your motherboard, the risk is relatively low. It’s always a good idea to have a backup of your important data and understand that BIOS updates are best performed when your system is stable, and you’re willing to take the small risk for potential improvements. If you’re unsure, consider seeking assistance from someone experienced in updating BIOS.
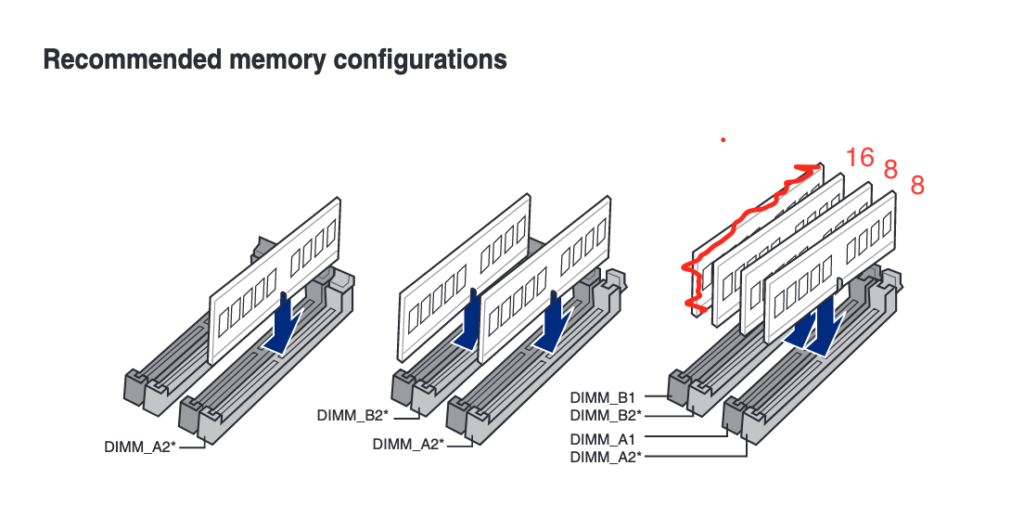
Memory Configuration.
What is XMP/DOCP settings and how do I use them?
Memory settings are a great time to optimize BIOS settings for gaming because incorrectly installed or RAM not set to its best speed leaves FPS on the table, and we don’t want that!
XMP (eXtreme Memory Profile) and DOCP (DRAM Overclocking Profile) are settings commonly found in BIOS/UEFI of computers, specifically for RAM (Random Access Memory) modules. These settings allow you to configure memory timings, frequencies, and voltages for optimal performance.
Ensuring your RAM is installed correctly is important. Don’t install RAM sticks next to each other. In a two-stick configuration there should be a gap between them. If they are next to each other your foregoing approximately 20% performance. Ensure there is a gap between them as per the diagram above.
XMP is typically used with Intel systems, while DOCP is associated with AMD systems. They provide pre-configured profiles that automatically set the best parameters for your RAM to run at higher frequencies than the default, thus boosting system performance. To use them, follow these steps:
- Access BIOS/UEFI: Restart your computer and enter the BIOS/UEFI settings. This is usually done by pressing a key like Delete, F2, F12, or Escape during bootup.
- Find Memory Settings: Navigate to the section related to memory settings or overclocking. Look for options labeled XMP or DOCP, depending on your system.
- Enable XMP/DOCP: Once you find the XMP or DOCP option, you can usually select a profile from a list. Profiles will have different memory frequencies and timings. Choose the one that matches your RAM specifications.
- Save and Exit: After selecting the desired profile, save your settings and exit the BIOS/UEFI. Your computer will reboot with the new memory settings applied.
It’s important to note that while XMP and DOCP can provide performance benefits, they can also be a bit risky. Overclocking memory may lead to stability issues or crashes.
Make sure your system can handle the new settings and keep an eye on your temperatures and system stability after applying them. If you encounter issues, you may need to manually adjust settings or revert to default values.
CPU Performance Settings.
Setting the CPU mode to “High Performance” or “Performance” in the BIOS can potentially provide certain performance benefits, but it’s important to understand the implications and considerations so optimize BIOS settings for gaming and getting more performance has some important considerations. Do you have enough cooling for CPU/GPU and your system in general. More performance generally comes with more heat to dissipate. Here are the potential benefits and factors to consider:
- Increased Clock Speed: Many CPUs have dynamic frequency scaling, where they adjust their clock speeds based on the workload to save power and reduce heat. Setting the CPU to a performance mode could keep the clock speed higher more consistently, leading to improved performance for tasks that benefit from higher clock speeds, such as single-threaded applications and gaming.
- Reduced Latency: Some CPU power-saving features might introduce latency as the CPU needs to ramp up its clock speed to respond to demanding tasks. Disabling these features in performance mode could reduce this latency, resulting in more immediate responses and smoother performance.
- Multithreaded Performance: Modern CPUs often have multiple cores and threads to handle parallel tasks. In performance mode, the CPU might prioritize allocating more resources to active threads, which can benefit applications that utilize multiple cores effectively.
- Faster Task Execution: With higher clock speeds and reduced power-saving features, tasks that are highly dependent on CPU performance, like video rendering or scientific simulations, could see faster execution times.
However, there are important considerations and potential downsides to be aware of:
- Increased Power Consumption: Running the CPU in high-performance mode can lead to higher power consumption and consequently increased heat generation. This can affect system stability, cooling requirements, and energy efficiency.
- Heat and Thermal Management: Higher clock speeds and sustained performance can lead to increased heat output. Your computer’s cooling system needs to be capable of handling the additional heat generated by the CPU, or the CPU might throttle its performance to prevent overheating.
- Reduced Lifespan: Running the CPU at higher clock speeds and voltages can potentially lead to increased wear and tear on the components, potentially reducing their lifespan over the long term.
- Noise: Depending on your cooling solution, running the CPU in high-performance mode might result in louder fan noise as the cooling system works harder to dissipate the additional heat.
- Diminished Energy Efficiency: If energy efficiency is a concern, running the CPU at high performance all the time can increase your system’s overall energy consumption.
Before making changes in the BIOS, it’s recommended to:
- Understand your CPU’s specifications and capabilities.
- Ensure your cooling solution is sufficient for the potential increase in heat.
- Monitor your system’s temperature and stability under the new settings.
- Consider your use case: Is the increased performance worth the trade-offs?
- Keep in mind that modern operating systems and CPUs often do a good job of managing performance dynamically. Manually setting a constant high-performance mode might not always yield significant benefits, especially for everyday tasks.
In summary, while setting the CPU mode to high performance can offer performance benefits, it comes with trade-offs such as increased power consumption, heat, and potential hardware stress. It’s important to weigh these factors based on your specific use case and hardware setup before making changes in the BIOS to optimize BIOS settings for gaming.
Shop.

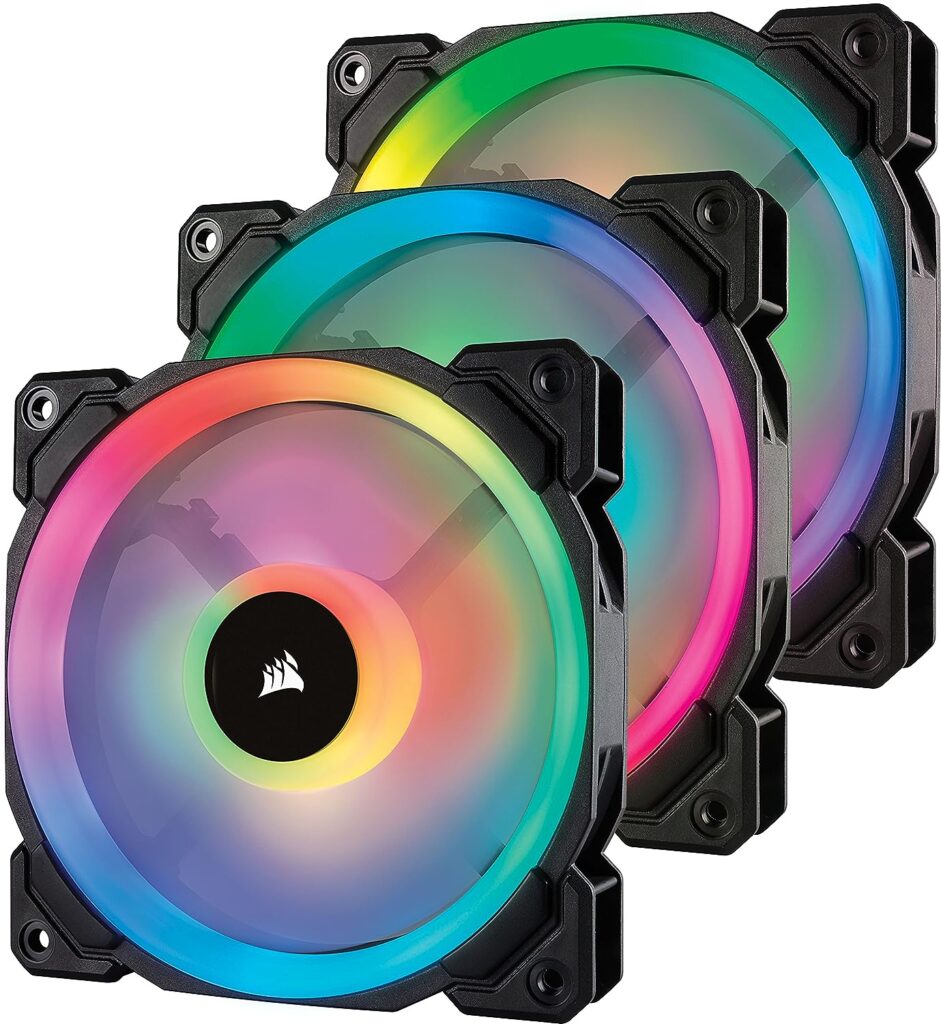
Fan Settings – Keep Cool.
In a computer system to optimize BIOS settings for gaming, fan settings can play a significant role in maintaining optimal performance and preventing overheating. Motherboard settings related to fan control can vary depending on the motherboard manufacturer and model. However, there are some general concepts and settings that can apply to most systems. These settings are typically found in the BIOS or UEFI firmware of the motherboard.
- Fan Control Modes:
- Auto: This mode allows the motherboard to automatically adjust fan speeds based on temperature readings from various sensors (such as CPU, GPU, motherboard, etc.). Auto mode is generally recommended for most users as it provides a balance between performance and noise.
- Manual: In this mode, you can manually set the fan speeds to fixed values, irrespective of the temperature. While it gives you precise control, it can also result in suboptimal cooling if not set correctly.
- Auto: This mode allows the motherboard to automatically adjust fan speeds based on temperature readings from various sensors (such as CPU, GPU, motherboard, etc.). Auto mode is generally recommended for most users as it provides a balance between performance and noise.
- Fan Curve:
- Auto Fan Curve: Some motherboards offer the option to customize the fan curve in auto mode. The fan curve determines how fast the fan spins at different temperature levels. A steeper curve will result in higher fan speeds at lower temperatures, which can help maintain lower temperatures during heavy workloads.
- Custom Fan Curve: If available, you can manually set a custom fan curve. This allows you to fine-tune the fan speeds at specific temperature points. Custom curves can be optimized for quieter operation or better cooling performance.
- Auto Fan Curve: Some motherboards offer the option to customize the fan curve in auto mode. The fan curve determines how fast the fan spins at different temperature levels. A steeper curve will result in higher fan speeds at lower temperatures, which can help maintain lower temperatures during heavy workloads.
- Temperature Sources:
- CPU Temperature: The CPU temperature is often the most critical factor when it comes to fan control. Setting fan speeds based on CPU temperature ensures that cooling is optimized for the most critical component.
- Motherboard Temperature: Some motherboards also allow you to set fan speeds based on the temperature of the motherboard itself, which can be helpful for maintaining stable motherboard operation.
- Fan Headers:
- Modern motherboards come with multiple fan headers that can control different fans in your system. Make sure you connect your fans to the appropriate headers if you want individual control.
- Modern motherboards come with multiple fan headers that can control different fans in your system. Make sure you connect your fans to the appropriate headers if you want individual control.
- Smart Fan Technology:
- Some motherboards offer advanced fan control technologies that analyze temperature data and adjust fan speeds dynamically. These technologies aim to strike a balance between cooling and noise without requiring extensive manual tuning.
- Some motherboards offer advanced fan control technologies that analyze temperature data and adjust fan speeds dynamically. These technologies aim to strike a balance between cooling and noise without requiring extensive manual tuning.
When it comes to high-performance scenarios, using the “Auto” mode is generally acceptable and recommended by motherboard manufacturers. Auto mode ensures that your system adapts to the workload and temperature changes, providing optimal cooling while minimizing unnecessary noise. However, for enthusiasts who want precise control over their system’s cooling, manual fan settings and custom fan curves might be more appealing.
Ultimately, the best approach depends on your specific hardware, workload, and noise tolerance. It’s a good practice to monitor your system’s temperatures and performance while testing different settings to find the right balance between cooling and noise for your high-performance needs.
Power Plan Settings.
Power settings in an operating system setting can optimize BIOS settings for gaming so refer to the configurations that determine how your computer manages energy consumption and performance. These settings are especially important for laptops and mobile devices to balance performance and battery life based on your usage patterns. Let’s delve into the two common power plans: “Balanced” and “High-Performance.”
- Balanced Power Plan: The Balanced power plan aims to strike a balance between performance and energy conservation. It’s a good choice for most users because it adjusts the system’s performance and power usage dynamically. Here’s how it typically works:
- CPU Speed: The processor’s speed is adjusted based on the current load. When the system is idle or performing light tasks, the CPU’s speed is lowered to save energy. When you demand more performance, the speed ramps up. Display
- Brightness: The display brightness might be reduced when the system is idle or inactive, which helps conserve power. Sleep Modes: The computer will enter sleep or hibernation mode after a certain period of inactivity. This helps save energy when the computer is not in use. USB and Hardware: Some components might be put into low-power modes when not actively in use.
The Balanced plan is generally suitable for everyday tasks like web browsing, document editing, and multimedia consumption. It ensures a reasonable compromise between performance and battery life. - High-Performance Power Plan: The High-Performance power plan prioritizes maximum performance over energy efficiency. This plan is more suitable for users who require high processing power and aren’t concerned about energy consumption or battery life. Here’s what you can expect from the High-Performance plan:
- CPU Speed: The CPU operates at its highest clock speeds most of the time, providing optimal performance for demanding tasks. Display Brightness: The display usually operates at its maximum brightness, ensuring the best visibility. Sleep Modes: The system might take longer to enter sleep or hibernation modes, which can lead to higher energy consumption during idle periods. USB and Hardware: All components operate at full power all the time, minimizing delays caused by low-power states.
When choosing a power plan, consider your typical usage scenario:
- If you need a balance between performance and battery life for everyday tasks, the Balanced plan is recommended.
- If you’re engaging in demanding tasks that require maximum system performance and you have access to a power source, the High-Performance plan might be more suitable.
Remember that some operating systems offer additional power plans or customization options, allowing you to tailor the settings more precisely to your needs. It’s a good practice to switch between plans based on your immediate requirements and power availability.
PCIE Settings.
Configuring PCIe settings correctly is important to ensure optimize BIOS settings for gaming & optimal performance plus stability of your system. Especially when dealing with high-performance components like graphics cards and other PCIe devices. Here’s how correctly configuring PCIe settings can benefit your system:
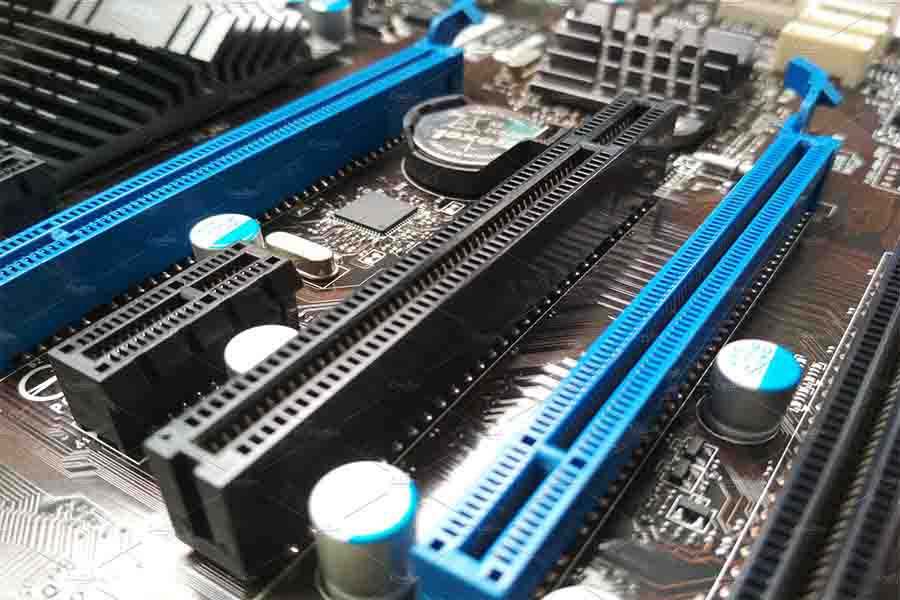
- Optimal Performance: PCIe (Peripheral Component Interconnect Express) is the interface through which various high-speed components, such as graphics cards, SSDs, and network cards, communicate with the CPU and the rest of the system. Configuring PCIe slots correctly ensures that these components can communicate at their maximum potential speeds, leading to improved overall system performance.
- Bandwidth Allocation: PCIe slots come in different generations (e.g., PCIe 3.0, PCIe 4.0) and lane configurations (e.g., x16, x8, x4), which determine the maximum bandwidth available for data transfer. Properly configuring these settings ensures that high-bandwidth components like graphics cards receive the necessary lanes for data transfer, preventing potential bottlenecks.
- Graphics Performance: Graphics cards often require a significant amount of data bandwidth for rendering complex graphics and performing calculations for gaming or professional applications. Configuring the PCIe slot for your graphics card as x16 (if available) and ensuring that it’s operating at the correct PCIe generation can lead to smoother gameplay and better graphics performance.
- Stability and Compatibility: Correct PCIe settings can also enhance system stability. Incorrect settings can lead to compatibility issues, system crashes, or even damage to components. Ensuring that the settings match the requirements of your hardware helps prevent these issues.
- Multi-GPU Configurations: If you’re using multiple graphics cards for gaming or specialized applications, proper PCIe slot configuration becomes even more crucial. Depending on the motherboard and CPU support, you might need to configure the slots to distribute the PCIe lanes effectively among the cards.
- NVMe SSD Performance: NVMe SSDs (Non-Volatile Memory Express Solid State Drives) use PCIe for faster data transfer compared to traditional SATA SSDs. Proper configuration ensures that your NVMe SSD is getting the required number of PCIe lanes for maximum performance.
- Expansion Card Performance: Other PCIe devices, such as network cards, sound cards, and RAID controllers, can also benefit from correct configuration. By allocating the appropriate PCIe lanes, you can avoid data congestion and ensure consistent performance.
- Software Compatibility: Some software, especially professional applications like video editing or 3D rendering software, can take advantage of the high-speed data transfer provided by PCIe. Correct settings help ensure that these applications can utilize the available bandwidth effectively.
It’s important to consult your motherboard’s manual and the documentation for your specific components to determine the optimal PCIe settings. These settings might involve BIOS/UEFI configurations, such as selecting the PCIe generation or configuring the lane allocation for each slot. Keep in mind that not all settings can be adjusted on all motherboards, as they depend on the hardware’s capabilities.
If you’re unsure about how to configure your PCIe settings, you might want to seek assistance from your motherboard manufacturer’s support or from knowledgeable communities that specialize in PC hardware and building.
USB Configuration.
USB (Universal Serial Bus) configuration settings can indeed have an impact on your system’s performance, though the extent of this impact can vary depending on the specific usage scenario and hardware involved. Optimizing USB settings primarily involves adjusting the power management and performance settings of USB ports and devices. Here’s how optimizing USB settings can benefit your system’s performance:
- Power Saving Mode:
- When USB devices are not actively transferring data, they can consume power even in standby mode. Enabling power-saving settings for USB ports can help conserve energy and extend battery life on laptops and mobile devices.
- However, enabling aggressive power-saving settings might cause a slight delay in device recognition when you plug in a USB device, as the device may take a moment to wake up from its low-power state.
- Performance Mode:
- USB ports and devices have various speed standards, such as USB 2.0, USB 3.0, USB 3.1, and USB 3.2. Each standard offers different data transfer rates, with newer standards generally providing faster speeds.
- Setting USB ports to performance mode ensures that they operate at their highest possible data transfer rates, which can be crucial for tasks that involve large file transfers, real-time media streaming, and other data-intensive operations.
- For example, if you’re using an external SSD or a high-speed USB flash drive to work with large files, enabling performance mode can significantly reduce the time it takes to transfer those files.
- USB ports and devices have various speed standards, such as USB 2.0, USB 3.0, USB 3.1, and USB 3.2. Each standard offers different data transfer rates, with newer standards generally providing faster speeds.
- Latency and Responsiveness:
- USB devices can introduce latency, especially when they are in power-saving mode. This can lead to a slight delay in response time when interacting with certain peripherals like mice, keyboards, and game controllers.
- Switching to performance mode can reduce this latency, leading to more responsive interactions. This can be particularly important in scenarios where low latency is critical, such as gaming or audio production.
- USB devices can introduce latency, especially when they are in power-saving mode. This can lead to a slight delay in response time when interacting with certain peripherals like mice, keyboards, and game controllers.
- Device Compatibility:
- Some USB devices may require higher power levels or specific settings to function properly. Optimizing USB settings can ensure that devices receive the required power and communication capabilities, preventing issues like dropped connections or data corruption.
It’s important to note that the impact of USB configuration on overall system performance might not be as noticeable on modern systems with powerful processors and abundant memory. However, in scenarios where USB devices play a crucial role, such as in data-intensive tasks, multimedia production, and high-performance computing, configuring USB settings can make a notable difference.
Keep in mind that the specific steps to configure USB settings can vary depending on your operating system and hardware. Generally, these settings can be accessed through your computer’s BIOS/UEFI settings or the operating system’s power management and device settings. Before making any changes, it’s a good idea to research the optimal settings for your hardware and your intended usage scenario to ensure you’re making the right adjustments.
- Latest CPU’s Available Now – Amazon.com
- Get a NEW GPU Best Performance – AMAZON.com
- Upgrade RAM Here today – AMAZON.com
- Prebuilt PC Options – AMAZON.com
SATA Configuration.
- SATA Mode: Set SATA mode to AHCI or RAID, depending on your storage configuration.
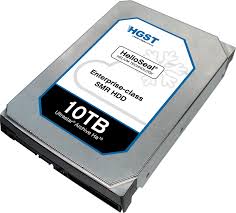
SATA (Serial Advanced Technology Attachment) is a type of interface used to connect storage devices like hard drives and solid-state drives (SSDs) to a computer’s motherboard. It’s the standard connection for most internal storage devices in modern computers.
AHCI (Advanced Host Controller Interface) and RAID (Redundant Array of Independent Disks) are different modes of operation for SATA controllers. Here’s a brief overview of each:
- AHCI (Advanced Host Controller Interface): AHCI is a standard protocol that allows the operating system to communicate with SATA controllers. It offers features like hot-swapping (connecting and disconnecting drives while the system is running), native command queuing (optimizing command execution), and support for TRIM (a command that improves SSD performance and longevity). AHCI is suitable for most users, especially those with single drives or those not looking to configure complex storage setups.
- RAID (Redundant Array of Independent Disks): RAID is a technology that involves using multiple drives in various configurations to improve performance, redundancy, or a combination of both. There are different RAID levels (RAID 0, 1, 5, 10, etc.), each with its own benefits and trade-offs. RAID can provide increased data protection, faster read/write speeds, and fault tolerance, depending on the configuration. However, configuring and managing RAID setups can be more complex, and it’s often used in situations where data integrity and performance are critical, such as in servers or high-performance workstations.
For most average users, setting SATA mode to AHCI is the appropriate choice. This mode offers good performance, compatibility, and features like TRIM for SSD maintenance. RAID is more relevant for users who require specific storage configurations, such as redundancy or performance improvements, and are willing to invest time in managing the RAID setup.
It’s worth noting that changing the SATA mode after installing the operating system can sometimes require additional steps or drivers, so it’s a good idea to make this decision before you install the OS. Always check your motherboard’s documentation for specific recommendations based on your hardware configuration.
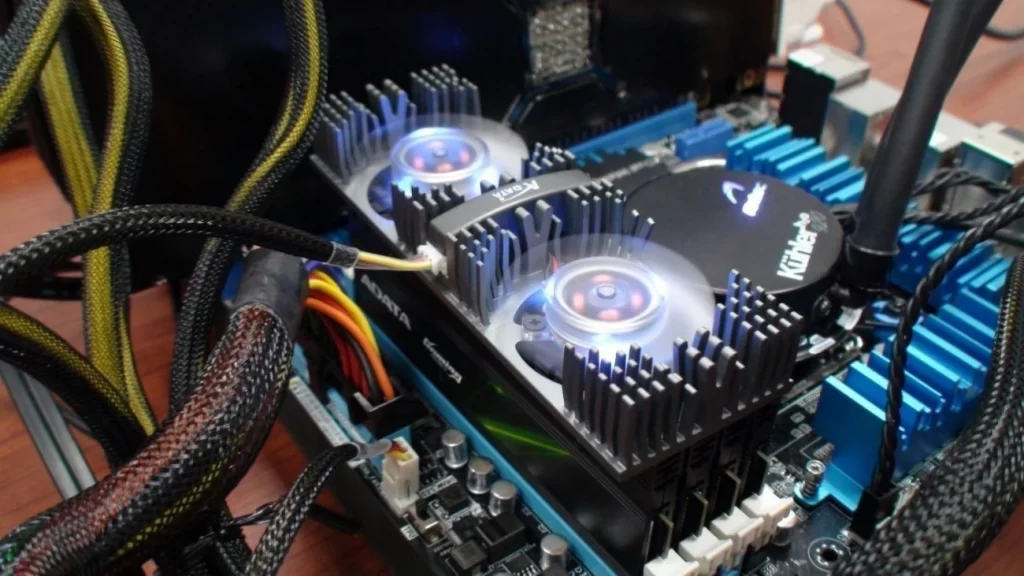
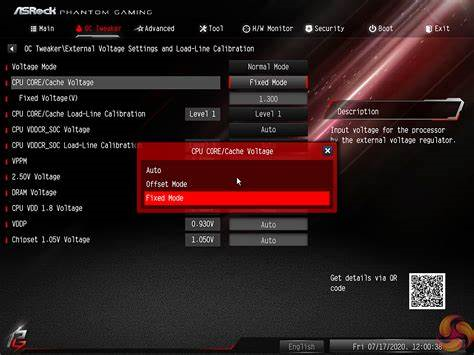
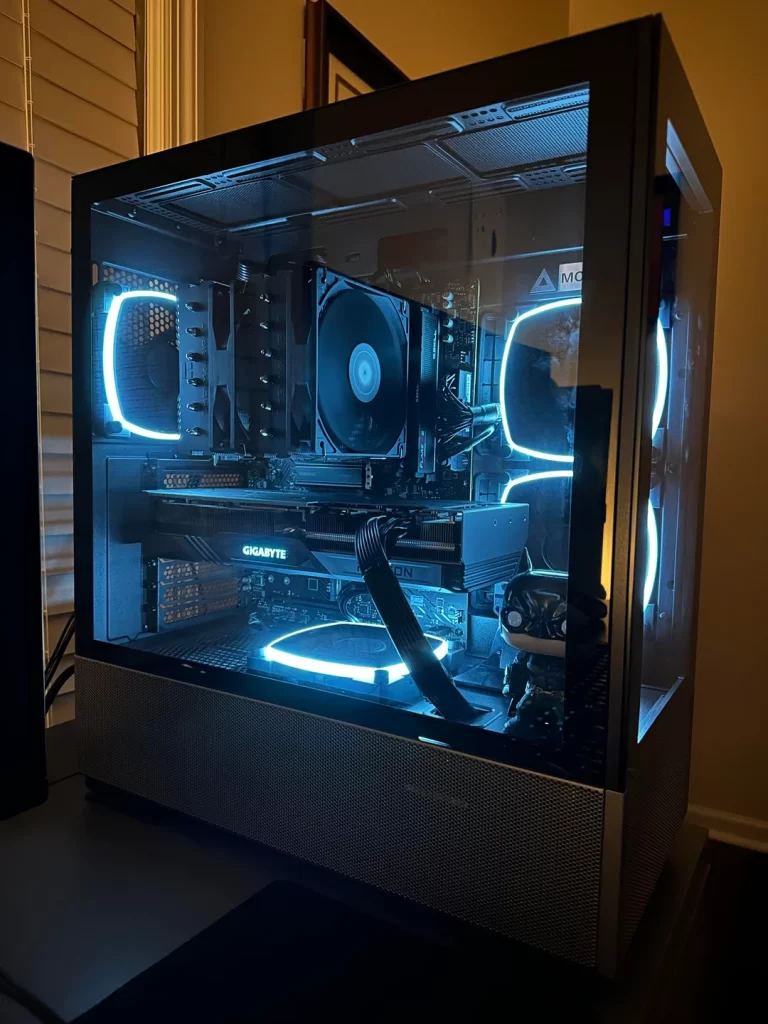
Cooling & Voltage.
- Cooling and Voltage: Adjust CPU and GPU voltages cautiously to find the right balance between performance and temperatures so you can optimize BIOS settings for gaming and benefit with better FPS.
Cooling and voltage settings play a significant role in affecting the performance and stability of a computer system, especially when it comes to processors (CPUs) and graphics cards (GPUs). Let’s break down how these settings can impact performance:
- Cooling Settings: Cooling refers to the mechanisms in place to keep the temperature of your components within safe operating limits. The cooling solution you use (air cooling, liquid cooling, etc.) and how efficiently it dissipates heat can affect performance.
- Effect on Performance:
- Higher Temperatures: If your components run hot due to inadequate cooling, they might start to throttle themselves to avoid damage. Throttling involves reducing the clock speeds and voltages of the components to lower the heat output, which can significantly reduce performance.
- Lower Stability: Excessive heat can lead to instability and crashes, as it can cause components to behave unpredictably. This can result in lower performance due to interrupted processes or system crashes.
- Voltage Settings: Voltage settings control the amount of electrical voltage supplied to the components. In particular, CPUs and GPUs can be adjusted to run at different voltage levels, affecting their power consumption and heat output.
- Effect on Performance:
- Undervolting: This involves lowering the voltage supplied to a component while maintaining stable operation. Undervolting can reduce power consumption and heat output, which may allow the component to run at higher clock speeds for longer periods, thus potentially improving performance. However, undervolting too much can cause instability and crashes.
- Overvolting: Increasing the voltage above the manufacturer’s specifications is known as overvolting. This can potentially allow for higher overclocks, where the component operates at speeds beyond its stock specifications. However, excessive overvolting can lead to higher heat output, reduced component lifespan, and even permanent damage.
- Undervolting: This involves lowering the voltage supplied to a component while maintaining stable operation. Undervolting can reduce power consumption and heat output, which may allow the component to run at higher clock speeds for longer periods, thus potentially improving performance. However, undervolting too much can cause instability and crashes.
It’s important to note that both cooling and voltage settings should be approached with caution:
- Cooling: Proper cooling is essential to maintain component lifespan and performance. Inadequate cooling can lead to overheating, component degradation, and potentially permanent damage.
- Voltage Settings: Changing voltage settings requires careful consideration and testing. Incorrect voltage settings can lead to instability, crashes, data corruption, and even hardware damage. Always start with small adjustments and thoroughly test the stability of your system.
If you’re interested in optimizing your system’s performance, consider the following steps:
- Monitor Temps: Use monitoring software to keep an eye on component temperatures. Ensure they stay within safe limits even under heavy load.
- Undervolting: Research your specific components and consider slight undervolting to balance power consumption and performance.
- Cooling Solutions: Invest in effective cooling solutions that match your usage demands. This could include better airflow, aftermarket cooling solutions, or liquid cooling.
- Testing: If you’re into overclocking or undervolting, conduct thorough stability testing using software tools like Prime95, AIDA64, or MemTest86 to ensure your changes are stable.
- Manufacturer Guidelines: Always follow your component manufacturer’s guidelines and recommendations to avoid voiding warranties or damaging your hardware.
Remember that every computer system is unique, and what works for one setup might not work for another. Proceed with caution, gather information, and make incremental adjustments to find the optimal balance between performance and stability.


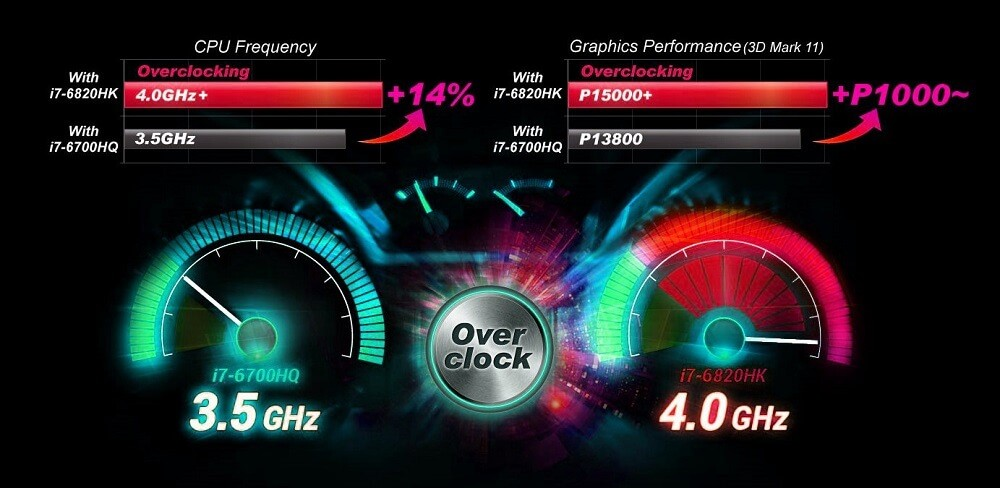
Overclocking.
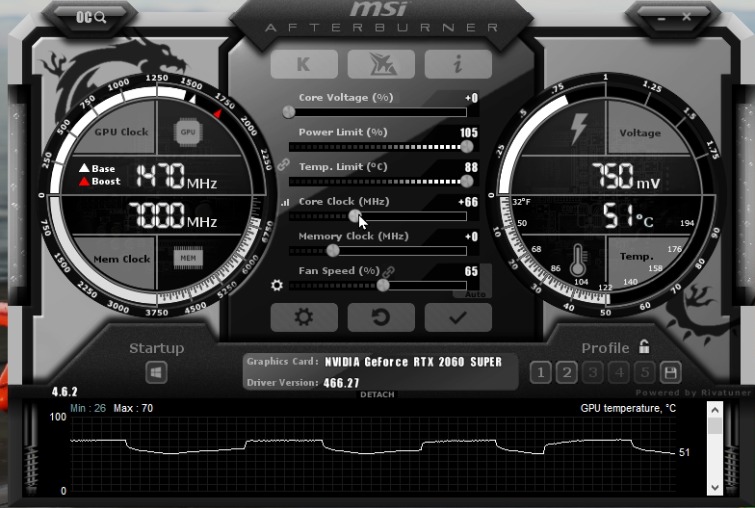
- Overclocking: If you’re comfortable, you can explore CPU and GPU overclocking settings, optimize BIOS settings for gaming but be cautious and monitor temperatures. Ensure you have the cooling to do so as much more hear will be created along with the better FPS. You can also use programs like MSI Afterburner to software overclock and even AMD’s Ryzen Master software can do it automatically in Windows 10/11.
Overclocking involves increasing the clock speeds of your CPU and GPU beyond their manufacturer-rated speeds to achieve higher performance. However, it’s important to note that overclocking also comes with certain risks and considerations. Let’s delve into CPU and GPU overclocking, the components you might need to upgrade, and whether the performance gain is beneficial.
CPU Overclocking: When overclocking a CPU, you can gain additional processing power, which can be particularly useful in tasks that are CPU-intensive, such as video editing, 3D rendering, and simulations. However, the extent of performance gain can vary based on the specific CPU model and the quality of your cooling solution.
GPU Overclocking: Overclocking a GPU can lead to higher frame rates in gaming and better performance in tasks that rely heavily on graphical processing, like video rendering and image editing. Like CPU overclocking, the degree of performance improvement varies based on the GPU model and the efficiency of your cooling setup.
Components You Might Need to Upgrade:
- Cooling Solution: Overclocking generates more heat, potentially leading to higher temperatures. You might need to invest in better cooling solutions, such as aftermarket CPU and GPU coolers, to maintain stable performance and prevent thermal throttling.
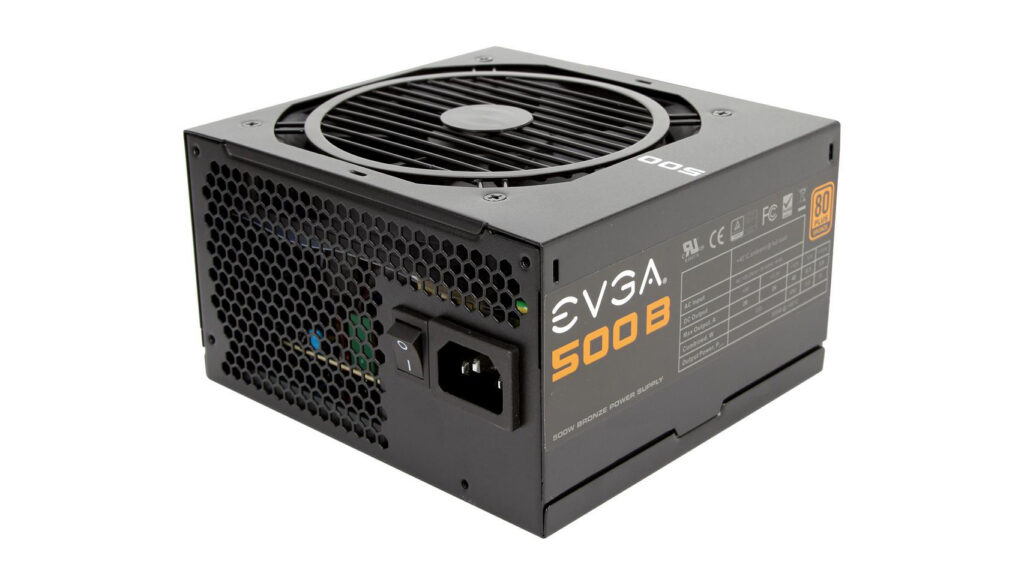
- Power Supply Unit (PSU): Overclocking can increase power consumption. If your current PSU is not powerful enough to handle the increased load, you may experience instability or crashes. Upgrading to a higher-wattage PSU might be necessary.
- Motherboard: Some motherboards are better equipped for overclocking than others. If you’re serious about overclocking, consider a motherboard with robust power delivery and sufficient VRM (Voltage Regulator Module) design to support stable overclocks.
Benefits and Considerations: Pros of overclocking:
- Improved performance in CPU/GPU-intensive tasks.
- Potential cost savings by extending the useful life of your hardware before needing an upgrade.
- Enhanced gaming experiences with higher frame rates.
Cons of overclocking:
- Increased heat generation, requiring better cooling solutions.
- Higher power consumption and potentially the need for a more powerful PSU.
- Voided warranties: Overclocking can void warranties on CPUs and GPUs.
- Reduced component lifespan: Overclocking can potentially lead to accelerated wear and tear on components.
Is the Performance Gain Beneficial? Whether the performance gain from overclocking is beneficial depends on your use case and goals. If you’re a casual user who primarily browses the web, watches videos, and does light productivity work, the performance gain might not be worth the potential risks and costs. On the other hand, if you’re a gamer, content creator, or someone who regularly engages in CPU/GPU-intensive tasks, overclocking could provide noticeable benefits.
It’s important to approach overclocking with caution. Always monitor temperatures, voltages, and stability while testing your overclocks. Gradually increase clock speeds and stress test your system to ensure stability and avoid damaging your components. If you’re uncomfortable with these processes, it might be best to stick with stock settings or seek advice from experienced overclockers.
Remember to research specific settings for your components, as well as seek advice from your motherboard’s manual or online forums related to your motherboard model. Overclocking and changing settings in BIOS carries risks, so make sure you understand what you’re doing or consult experienced users if you’re unsure.

Author.
Brendon McAliece is a multi-lingual expat who brings over three decades of flight simulator/PC building experience as well as over two decades of real-world jet fighter experience as a weapons/egress technician. He holds a sport pilot certificate giving him real-world flying experience.
His travels have taken him from Europe to the Middle East, Asia and his home of Australia. He has a passion for travel, languages, Flight simulation as well as Guitaring and Coffee. You can read more in his blogs below.
Learn More @ DreamingGuitar.com – DreamingCoffee.com – LetsFlyVFR.com
( HOME – BLOG – SHOP – ABOUT )
As an Amazon affiliate I may benefit from qualifying sales.