
How to use X Plane 11 Camera Controls for AMAZING Views!
X PLANE 11 Camera Controls Tutorial.

When your new the X Plane 11 Camera controls can be confusing like any new flight simulator. X Plane 11 like Microsoft flight simulator 2020 are very different so if you have come from FSX then its a challenge. The good thing is it need not be a big issue as the controls are well thought out and easy to setup in a few minutes.
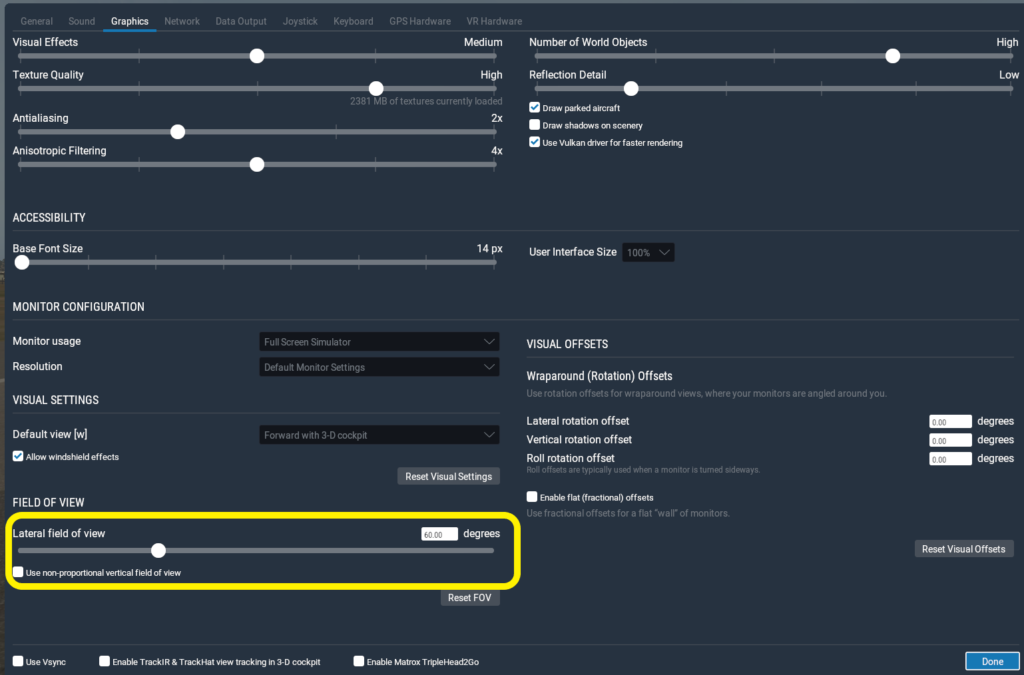
X Plane 11 – Camera Controls – Field Of View.
Setting the field of view can be very helpful initially. It will give you a more natural field of view on your monitor. Setting X Plane 11 camera controls to do this is fast and easy. You will find it in the X Plane 11 graphics menu. The Default id set to 60 degrees but moving the slider up to 90 degrees I feel is a great place to start. This is a bit more natural in my point of view.
The graphics field of view is highlighted with a yellow box for you. I would recommend selecting this to about 90 degrees after you have checked out the 60 degrees default. Its easy to adjust. Simply move the slider and go back to the cockpit by resuming your flight and see if you like it.
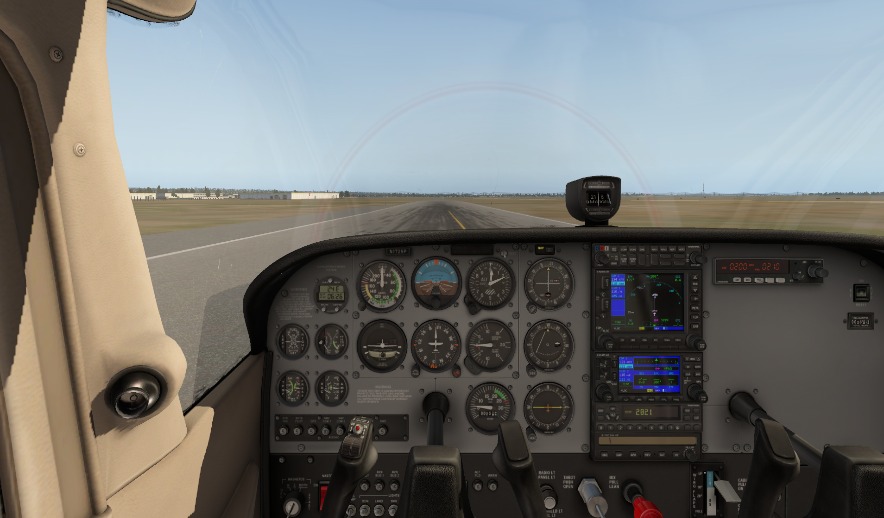
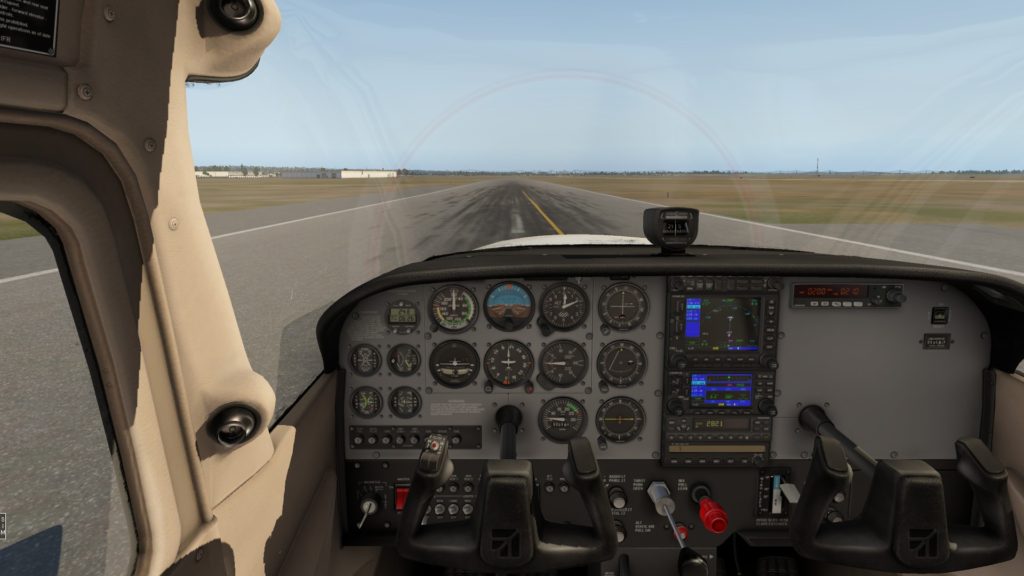
This is the default view at 60 degrees. It is a good view giving you a concentrated view of the instruments and through the windshield of the aircraft.
I feel this is a bit to narrow for my liking and as always its a personal choice. If you move it out the view is more natural and you can see the whole dash.
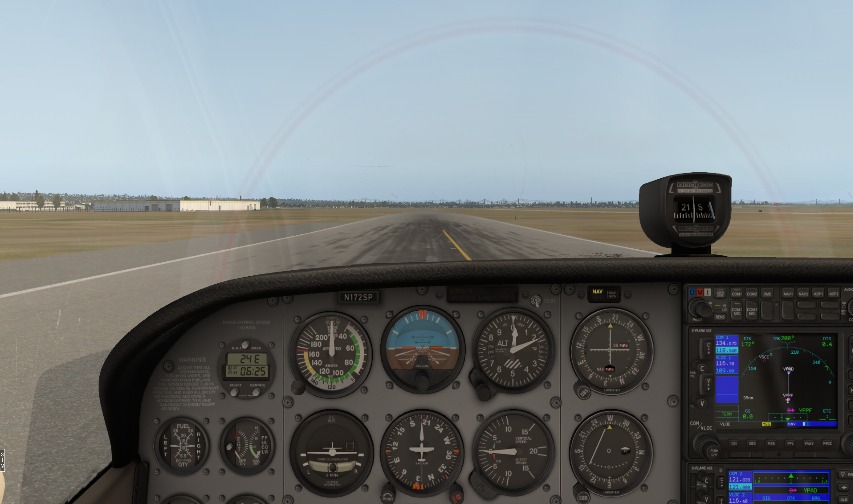
In setting the field of view out to 90 degrees it essentially pushes you backward and gives you a wider more natural field of view. You may choose to go wider or narrow some. Its a personal choice. It does not effect your view in virtual reality. I have not see any adjustment in this effect virtual reality at all.
- Joystick / HOTAS – AMAZON.com
- Rudder Pedals – AMAZON.com
- Throttle Quadrant – AMAZON.com
- Gaming Chair – AMAZON.com
- VR Headset – AMAZON.com
Camera Controls. Left Right Up and Down.
Now we have decides our field of view we can position out personal cockpit view. You can move the camera up down as well as left and right simply with the arrow keys on the keyboard.

You can zoom in and out by using the mouse wheel or on the keyboard and use the comma and full stop to zoom from the keyboard.
Camera Controls Rotate Up and Around.
The X Plane 11 camera controls rotation function is a very useful set of keys. These will allow you to rotate your view and then save quarter left and right views as well as 90 degrees under each wing views.
To rotate your internal and in some case external views which we will get to soon is fast and easy. The “Q” and “R” keys give you the sideways rotation of your camera view. The “R” and “F” keys will rotate your view up and down without changing the height of the camera. Very useful to get views of overhead consoles in you Zibo or other airliner.

Camera Controls – Cockpit Views.
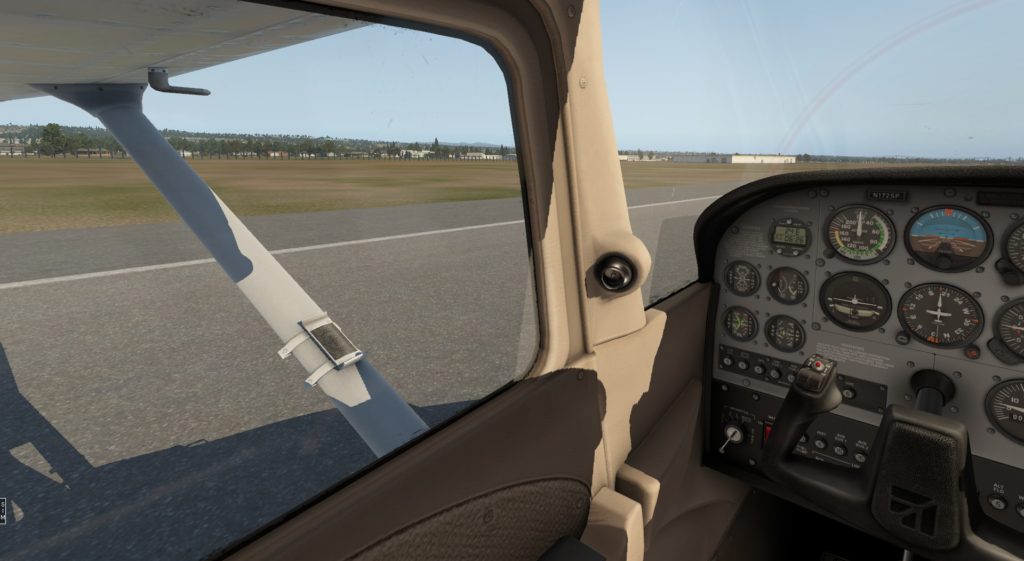
The set up of the X Plane 11 camera controls makes it very easy to look around the cockpit as well as a more natural view from the cockpit having set the view FOV out to 90 degrees. The 45 and 90 degrees settings help with flying the circuit and general looking around.
You can of course add more views with close up of the GPS and engine instruments, overhead consoles on your airliners and even back in the cabin should you want to become a passenger for a while. Moving right you can take up the right Instructors seat if your planning to fly from this side
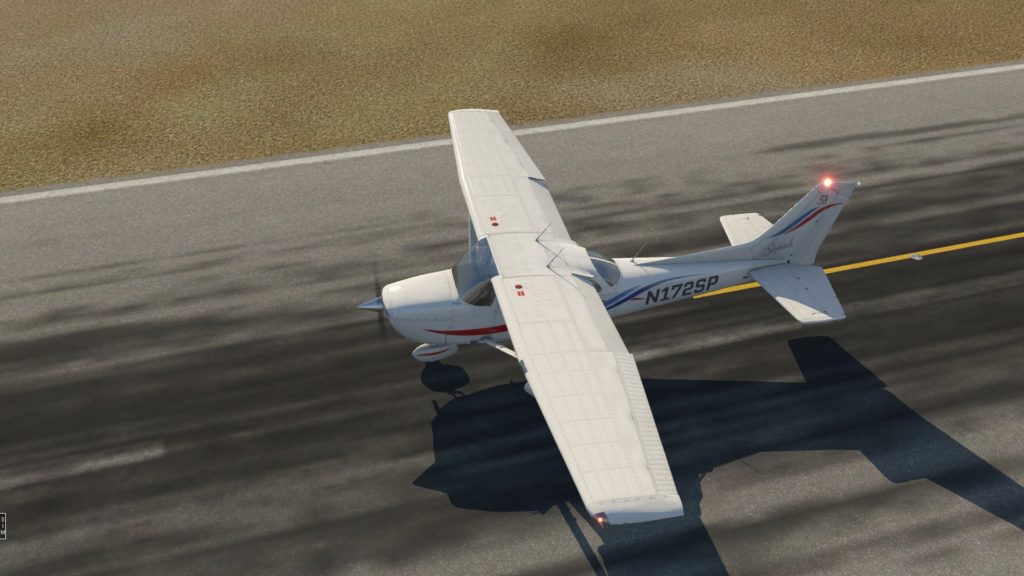
X Plane 11 Camera Controls. External View.
X Plane 11 camera controls can allow you to look from a number of external views from fly past, fly along as well as end of runway camera plus the tower camera.
The first view is SHIFT + 1 which gives you the Linear Spot View. This view is adjustable with the normal view commands.
The second view SHIFT + 2 and is is the still spot view. This view is not adjustable and remains fixed on the aircraft.
The next view with SHIFT + 3 is the runway view. This will track your aircraft no matter if its in view or not. It will not move but you can zoom in as your aircraft takes off or is in the circuit or landing. Great shots on late final for video creators
The next view is SHIFT + 4 and this gives you a Circle View as well as a fly past view when the aircraft is flying.
The Tower View is Shift + 5 and this will also allow you to track your aircraft as well as look around with your controls. It does always know where your aircraft is so it does not always rotate square to the horizon. It tends to rotate around the center view. Limited use.
The ride along view is Shift + 6 and gives you a close in view from the rear. This you can zoom in and out on.
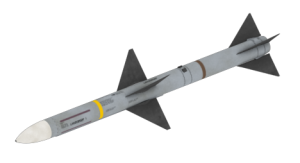
The Shift + 7 Keys will give you a missile or weapon track view. Yes you can have combat in X Plane 11 by selecting combat and selecting some opponents in the aircraft menu.
Camera Controls. Cinematic, Sunglasses , Night Vision.
These are a set of filters for different effects with cinematic for normal use with sunglasses if its getting sunny outside which dives you a darker tint. If your flying at night you can try the night vision setting from the menu as well. There are also some other views that you may find useful:
The 3D path with Shift + P shows your flight path.
3D path reset is done with Shift + P
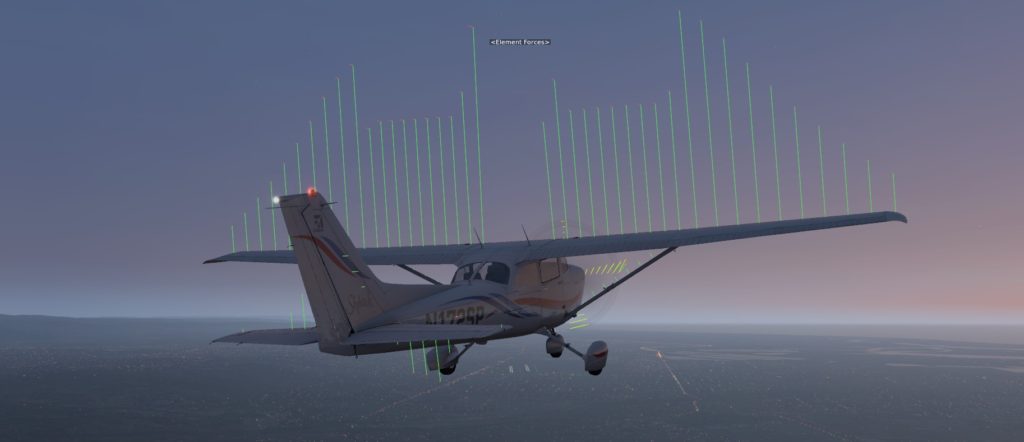
Show physics model is Shift + M (Cycles through several different displays.)
The tints from Cinema and sunglasses are only subtle but the night vision gives you the green tinge but I don’t think it actually improves your view at all.
The Physics data display comes in a number of varieties but his is a graphic showing the performance of the wing surfaces. Notice the elevator is drawing the tail down. This is the difference between a traditional aircraft and a canard aircraft like the long eze which all surfaces provide lift upwards.
X Plane 11 Camera Controls. Saving Cockpit Views.

Setting views is very easy and can be done however you like. The choice of layout is yours. All you need to do is use the arrow keys to move up down as well as left and right as previously mentioned and the rotate keys plus the zoom keys to get the exact view you require.
TO save the view you have to hold down CTRL plus a Numpad key. My choice is normally CTR + Num Pad 8 as my pilot view and then 1/4 left with CTR + 7 and CRT 4 moving around the number pad to get the 90 degree left view.
You can also move around the cockpit to save additional views like the overhead consoles or closeups of the GPS or other important items as you see fit. I hope you have found this quick guide useful and get you started saving and adjusting your control views for X Plane 11.
The X Plane 11 camera controls are quick to setup and once done can be left until you find another aircraft that needs adjusting and you can save the views in different profiles as you need.


- Latest CPU’s Available Now – Amazon.com
- Get a NEW GPU Best Performance – AMAZON.com
- Upgrade RAM Here today – AMAZON.com
- Prebuilt PC Options – AMAZON.com
Author
Brendon McAliece (Aka Gunnie) is a a military veteran with 23 years working on Jet Fighters, their weapons systems and ejection seat/module systems as well as munitions and R&D. Involved with flight simulation since the 1980s, he has flown all the major flight simulators over the years.
He is an Australian expat who has lived in Malaysia, UK, Saudi Arabia and more recently Thailand. He is a multi-lingual blogger who loves to share his life experiences here on LetsFlyVFR.com and DreamingGuitar.com, with his lifestyle and Travel experiences Blog plus his Dreaming Coffee website.
Learn More @
DreamingGuitar.com – DreamingCoffee.com – LetsFlyVFR.com
( HOME – BLOG – SHOP – ABOUT )
As an Amazon affiliate I may benefit from qualifying sales.