How to Fly a Perfect VFR Circuit.
(Step-by-Step Guide)
(Disclaimer: Intended for flight simulation use only!)
A good VFR circuit is one of the most important skills in aviation. You should always remember that a takeoff is optional but a landing is mandatory.
Whether you’re flying in Microsoft Flight Simulator or X-Plane 12, learning proper circuit procedures will instantly improve your landings, your situational awareness, and your confidence around airports.
The good news?
A VFR circuit is not complicated once you understand the flow.
In this VFR circuit guide, we’ll break the entire process down into simple real-world steps using proper aviation terminology without turning it into airline-level theory.
By the end, you’ll understand:
- What a VFR circuit actually is
- How each leg works
- When to turn
- How to manage speed and altitude
- Common mistakes sim pilots make
- How to consistently fly stable approaches
Let’s get airborne.
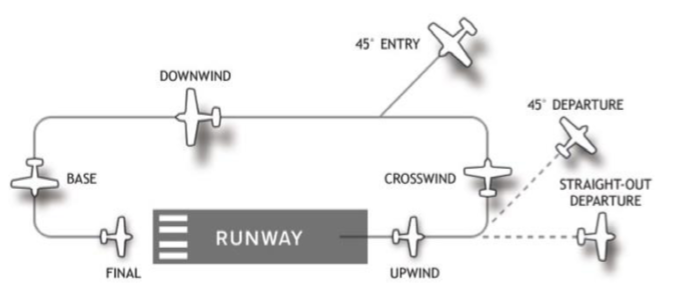
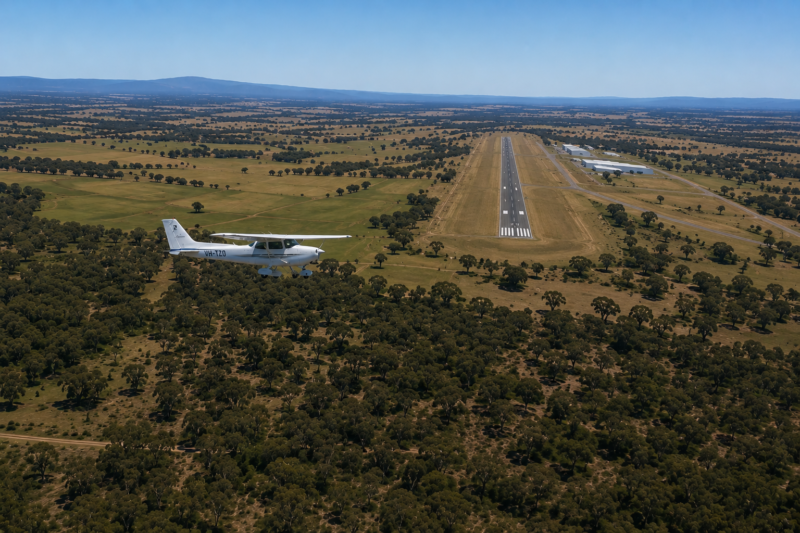
What Is a VFR Circuit?
A VFR circuit (also called a traffic pattern in the United States) is the standard rectangular flight path aircraft use around an airport when taking off and landing under Visual Flight Rules (VFR).
The goal is simple:
Create predictable aircraft movement so pilots can safely sequence themselves into landing.
A standard circuit consists of five legs:
- Upwind / Departure Leg
- Crosswind Leg
- Downwind Leg
- Base Leg
- Final Approach
Most VFR circuit training flights are flown at approximately 1,000 feet above ground level (AGL), although this varies depending on the airport and aircraft.
The Basic VFR Circuit Layout.
Before You Take Off
Before entering the circuit, make sure you:
- Know the active runway
- Check wind direction
- Set takeoff flaps if required
- Review your target speeds
- Understand circuit direction (left-hand or right-hand)
- Brief yourself on the departure
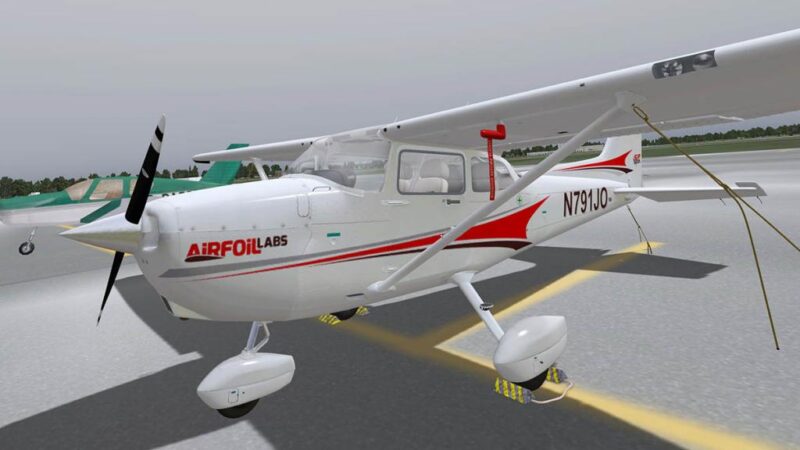
For beginners, the Cessna 172 is ideal because it gives you time to think and stay ahead of the aircraft. Keeping your mind ahead of the aircraft is really important so as not to be overwhelmed especially when your new.
There is a lot happening in a short period of time. Being prepared is so important.
Typical training setup:
- Aircraft: C172
- Circuit altitude: 1,000 feet AGL
- Pattern speed: ~90 knots
- Final approach speed: ~65 knots
Step 1 — Takeoff and Upwind Leg.
Apply smooth power and maintain runway centerline. Applying power smoothly will enable you to get the correct rudder pressure and maintain the centreline of the runway.

Torque from the propeller pushing air back will apply a twisting force called P Factor which will try and turn you around. Smooth power application can help you be ready to remain straight and on the runway.
As the aircraft accelerates:
- Rotate at the correct speed.
- Establish a positive climb.
- Retract flaps gradually if used.
- Maintain runway heading.
This first section is called the upwind leg.
Your priority here is stability.
Avoid aggressive turns immediately after takeoff.
A common beginner mistake is turning too early and while still low and slow.
Instead:
- Climb safely
- Trim the aircraft
- Maintain coordinated flight
- Keep scanning outside
Most pilots begin the crosswind turn around 500 feet AGL unless local procedures differ. Make a gentle turn keeping the ball centred and maintain good airspeed!
This point is where many general aviation pilots die every year unnecessarily.
Stall Spins take too many lives so read more here – Adverse Yaw & Spins.
Step 2 — Crosswind Leg.
At circuit turning altitude:
Begin a smooth 90-degree turn away from the runway at 500ft AGL.
This is the crosswind leg.
Your goals here are:
- Continue climbing toward circuit altitude
- Maintain airspeed
- Keep the turn coordinated
- Start building situational awareness
Look for:
- Other traffic
- Runway position
- Wind drift
Once approaching circuit altitude, begin leveling off and reducing climb power.
Check Inbound traffic wanting to enter the downwind leg, Check Downwind for other aircraft – Check the runway for any more traffic you may have to account for. Repeat this at each turn and stay alive.
Step 3 — Downwind Leg.
The downwind leg is where the circuit starts to come together.
You fly parallel to the runway in the opposite direction of landing. Generally the tip of your aircraft will run jest next to the runway so you know you have good distance with a low wing but a Cessna 172 needs you to check the strut and place the runway at about half way up it.
This is the time to stabilize the aircraft.
Key priorities:
- Maintain circuit altitude
- Maintain pattern speed
- Complete landing checks
- Monitor spacing from the runway
A good visual reference is keeping the runway approximately halfway up the wing strut in a C172.
Too close?
Your base turn becomes tight and unstable.
Too far?
You may struggle to reach the runway without excessive descent.
Typical downwind checks:
- Fuel — ON
- Mixture — RICH
- Landing light — ON
- Carb heat — AS REQUIRED
- Brakes — CHECKED
In simulators, many pilots rush this section.
Slow down mentally.
A stable downwind creates a stable landing. Its time to take a big breath and relax until you get to your turn to base leg. Get trimmed, on speed and mentally already be at the turn point ready to make that physical turn and decent.
When Should You Turn Base?
This is one of the most common questions in VFR flying.
A good beginner rule:
Turn base when the runway threshold sits roughly 45 degrees behind your wing.
This normally gives enough room for:
- Descent setup
- Flap deployment
- Airspeed control
- A stabilized final
Wind changes everything.
Strong tailwinds on downwind may require an earlier base turn.
Strong headwinds may require turning later.
This judgment improves naturally with experience. Be conscious of your attitude relative to the runway. Are you parallel or are you having to point towards or away from the runway reciprocal heading to remain at the correct distance. Winds will often require you to adjust this so be ready.
Step 4 — Base Leg.
The base leg transitions you from the downwind onto final approach.
This is where energy management becomes critical.
Start reducing power and descending smoothly.
Typical actions:
- First stage of flaps
- Reduce speed
- Begin descent
- Trim the aircraft
- Scan for traffic
A stable base leg should feel calm.
If you feel rushed, fast, or high:
Go around early rather than forcing the landing. A go around is OK!
One of the biggest improvements a sim pilot can make is learning when NOT to continue an unstable approach.
Real pilots do this constantly. If it feels wrong or looks wrong then go around!
Judging your turn to final is also another important skill! If you turn late then go around again.
Repeating myself here but if you are off the centreline there is a desire to turn the controls to bank back towards centreline but more DANGERIOUSLY is a desire to add rudder to make the turn faster and you WILL DIE if you do this!
Adverse Yaw Kills – Read more here NOW! (Please)
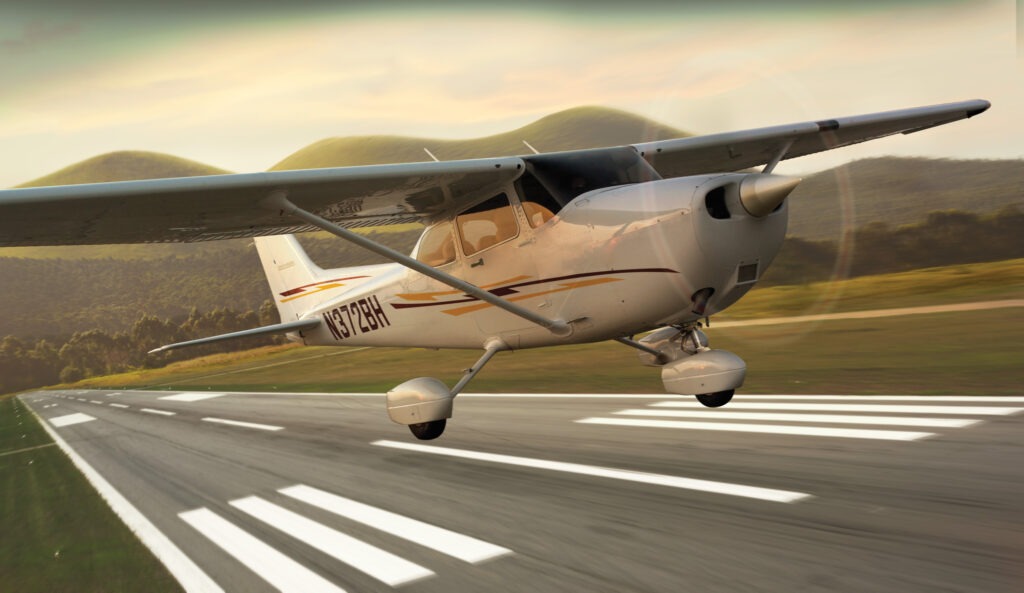
Step 5 — Final Approach.
Final approach is where everything connects.
Turn smoothly onto runway centerline and stabilize the aircraft.
Your priorities are now:
- Correct airspeed
- Stable descent rate
- Runway alignment
- Proper flap setting
- Small smooth corrections
For most light aircraft:
Pitch Controls Decent or Power Argument!
Note: The above version of Power controls decent & Pitch controls airspeed is a controversial subject because some reverse this when landing where Poser controls Pitch and power controls decent rate. This argument rages in flight school coffee shops often!
USAF uses the former and Navy used the latter version. Which one is correct has been argued by passionate pilots since we got wings! Your instructor will have their opinion too!
Continuing on!
This takes balancing act takes practice. Regardless of your instructors point of view and of course mine either is valid but be prepared to defend your choice when it comes up in a conversation. Good luck!
Avoid chasing the runway with large control inputs.
Instead:
Make small corrections early. A stable final should feel almost boring. If the approach becomes unstable:
GO AROUND.
This is not failure. It is good airmanship is the best result and a safe landing. On one flight of my own I had to do 5 go arounds when I dearly wanted just to get on the ground! The winds came up at my airport making the whole landing a super challenge.
It pushed my skills and patience to the limit when no one else could help me. I did three approaches then flew away and got my head together before returning to the circuit and making one more go around then finally a landing. I have never been as relieved to be back on the ground. Have faith in your skills and be patient!
The Landing Flare.
As you cross the runway threshold:
- Reduce power smoothly.
- Shift your eyes toward the far end of the runway.
- Begin gently raising the nose.
- Allow the aircraft to settle naturally.
Do not force the aircraft onto the runway.
Patience matters.
Most hard landings happen because pilots stop flying too early.
Continue flying the aircraft all the way through touchdown.
Site picture has a lot to do with you landing smoothly or bouncing. If your focussed on the point you want to lad on you will nearly always hit it hard and bounce (even in a sim) so remember to move your site picture to the end of the runway/horizon. This made my landings (Real world & Sim) so so smooth!
Common VFR Circuit Mistakes.
Turning Too Early After Takeoff.
Stay safe and stable before maneuvering. Take your time and ensure you maintain a good climb rate but at the correct climb speed! Speed is life! A stall here will kill you!
Flying Too Fast.
Speed creates workload.
Beginners often fly circuits much faster than necessary. Manage your speeds and your circuit flying will improve greatly.
Overshooting Final
Usually caused by:
- Late base turns
- Excessive speed
- Poor wind correction
Looking Inside Too Much! Don’t!
VFR flying is visual. Keep your eyes outside and look, remember your visual references and you will be fine!
Most of your attention belongs outside the cockpit. Look for references as you turn in level flight as well as in climbs and descents. A climbing turn will place the horizon at a specific place across your dashboard/instrument panel. The same is true of descents and level turns right and left. Learn these site pictures and you will be a great VFR pilot.
Forcing Bad Landings.
A go-around is almost always smarter than salvaging an unstable approach. We see many aircraft videos where a go around was an option but the pilot forces the landing often landing long then running out of runway. Go Around!
How Real Pilots Improve Circuits Faster.
The secret is consistency.
Do the same thing every circuit.
Use:
- The same speeds
- The same flap settings
- The same power settings
- The same visual references
This builds pattern recognition.
Eventually, the entire circuit begins to feel automatic.
That’s when your flying improves rapidly.
Best Aircraft for Learning VFR Circuits in Simulators.
Microsoft Flight Simulator.
- Cessna 152
- Cessna 172
- CubCrafters XCub
- Piper PA-28 (third-party)
Microsoft flight simulator is generally more graphically pleasing than X Plane 12 currently. The flight physics I personally don’t think equate to as real as possible.
Yes, I’m an X Plane fan boy!
X-Plane 12
- Cessna 172
- Baron 58
- REP-enhanced trainers
- Zibo 737 (for advanced circuit practice)
Stick with slow aircraft first.
Fast aircraft hide poor technique.
Training aircraft expose it.
X Plane 12 gives me a more realistic training experience when li lift off in my Cessna 172 or Barron 58 and the aircraft immediately swings into the crosswind! That feels real and is one of the many reasons I think X Plane 12 is superior in the flight physics department. Its ok if you disagree with me. Fly the simulator that feels the best for you!
Cessna 172 – Your Stead!
Cessna 172 Key Airspeeds Reference Table.
Note:
These are the commonly taught training/reference speeds used in most modern 172 operations.
Always confirm with your aircraft’s POH.
| Speed | Knots (KIAS) | What It Means | Typical Use |
|---|---|---|---|
| Vs0 | 40 KIAS | Stall speed in landing configuration (full flaps) | Slow flight, landing awareness |
| Vs1 | 48 KIAS | Stall speed clean (flaps up) | Clean configuration stall reference |
| Vr | 55 KIAS | Rotation speed | Begin lifting nose during takeoff |
| Vx | 62 KIAS | Best angle of climb | Clears obstacles after takeoff |
| Vy | 74 KIAS | Best rate of climb | Gains altitude fastest |
| Best Glide | 68 KIAS | Maximum glide distance after engine failure | Engine-out emergencies |
| Va | 90–105 KIAS | Maneuvering speed | Turbulence / aggressive control inputs |
| Vfe (10° flaps) | 110 KIAS | Max speed with 10° flaps | Initial flap deployment |
| Vfe (Full flaps) | 85 KIAS | Max speed with >10° flaps | Approach and landing |
| Normal Approach | 65–70 KIAS | Standard landing approach speed | Typical landing |
| Short Field Approach | 61 KIAS | Slower controlled approach | Short runway landings |
| Cruise Climb | 80–85 KIAS | More efficient climb with better cooling/visibility | Enroute climb |
| Normal Cruise | 105–125 KIAS | Typical cruise range | Cross-country flying |
| Vne | 163 KIAS | Never exceed speed | Structural safety limit |
What The Important Speeds Actually Mean
Vx — Best Angle of Climb
V_x
- Gives the most altitude over the shortest ground distance
- Used after takeoff when clearing:
- Trees
- Hills
- Obstacles
- Nose attitude is relatively high
Think:
“How do I climb over something in front of me?”
Vy — Best Rate of Climb
V_y
- Gives the fastest altitude gain over time
- Best general climb speed after obstacle clearance
- Better engine cooling and visibility than Vx
Think:
“How do I get to altitude fastest?”
Vs0 — Stall Speed Landing Configuration
V_{S0}
- Stall speed with:
- Full flaps
- Landing configuration
- Important for approaches and flare
Why it matters:
Flying too close to this speed near the ground can cause an approach stall.
Vs1 — Clean Stall Speed
V_{S1}
- Stall speed with:
- Flaps up
- Clean aircraft
- Used in training and maneuvering awareness
Va — Maneuvering Speed
V_a
- Maximum speed for full control inputs
- Important in:
- Turbulence
- Training maneuvers
- Steep turns
Key Point:
Above Va, aggressive control movement can overstress the aircraft.
Best Glide Speed
V_g
- Gives maximum glide distance after engine failure
- First memory item in many engine-out emergencies
Think:
“How far can I glide?”
Easy Student Pilot Memory Flow.
| Phase | Typical Speed |
|---|---|
| Rotate | 55 |
| Obstacle climb | 62 (Vx) |
| Normal climb | 74 (Vy) |
| Cruise climb | 80–85 |
| Downwind | 90 |
| Base | 75 |
| Final | 65 |
| Short final | 60–61 |
Quick Mental Picture.
It is amazingly good practice to mentally go through your flight mentally before even leaving the hangar or FBO. Knowing what your man plan is and be ready to accomplish it mentally by walking through each step while having a coffee is positive.
Think about the possible issues and how you WILL Handle them.
Engine failure on the runway – When to stop if you have low engine power?
What’s Reference point? is it the 1000 ft marker – 2000ft marker – the second runway entrance? Decide now.
Engine failure on climb out? Where do you go first? The highway or the open field you fly over regularly. Think and plan now! Every step of the coming flight you should consider what’s the alternative route, airport, return parameters etc.
| Speed Type | Purpose |
|---|---|
| Vx | Climb over obstacles |
| Vy | Climb fastest |
| Vs0 | Stall with flaps |
| Vs1 | Stall clean |
| Va | Safe maneuvering |
| Vg | Best glide distance |
| Vfe | Max flap speed |
| Vne | Never exceed |
Final Thoughts.
A perfect VFR circuit is not about looking impressive. It’s about consistency, stability, and predictability. The pilots who improve fastest are usually the ones who slow down, stay organized, and fly disciplined patterns.
Master the circuit and every other part of VFR flying becomes easier.
And remember:
Every great landing starts with a great circuit.
We may not be the BLUE ANGELS in our Cessna 172 or any other aircraft but we should BRIEF and Practice Our Flights the Same Way!

Upcoming Blog Posts for Sim Pilots on LetsFlyVFR.com
Link these naturally throughout the article when published:
- Beginner’s Guide to VFR Flying
- Understanding Airspeed in Flight Simulators
- How to Land Smoothly Every Time
- VFR Radio Calls Explained
- Best Training Aircraft in Microsoft Flight Simulator
- How Wind Affects Your Landing
- Understanding Flaps and Energy Management
- How to Fly a Go-Around Correctly
- Circuit Altitudes and Airport Traffic Patterns Explained
- X-Plane 12 vs MSFS for VFR Flying
Knowledge Base.
Use sparingly for credibility:
FAQ:
What altitude is a standard VFR circuit?
Most standard VFR circuits are flown at approximately 1,000 feet above ground level, but local airport procedures may vary.
What speed should I fly in a VFR circuit?
Typical light aircraft circuit speeds range from 80–100 knots depending on the aircraft type.
What is the difference between a traffic pattern and a VFR circuit?
They are effectively the same thing. “Traffic pattern” is more common in the United States, while “VFR circuit” is commonly used internationally.
Should beginners practice touch-and-go landings?
Yes, touch-and-go circuits are one of the fastest ways to improve landing consistency and pattern discipline.
YouTube Companion Video
How to Fly a Perfect VFR Circuit in MSFS or X-Plane 12
Thumbnail Text:
“STOP BOTCHING YOUR LANDINGS”
“Learn real-world VFR flying in Microsoft Flight Simulator and X-Plane 12 simplified.”
Author
Brendon McAliece (Aka Gunnie) is a military veteran with 23 years working on Jet Fighters, their weapons systems and ejection seat/module systems as well as munitions and R&D. Involved with flight simulation since the 1980s, he has flown all the major flight simulators over the years.
He is an Australian expat who has lived in Malaysia, UK, Saudi Arabia and more recently Thailand. He is a multi-lingual blogger who loves to share his life experiences here on LetsFlyVFR.com and DreamingGuitar.com, with his lifestyle and Travel experiences Blog plus his Dreaming Coffee website.